How to Design a Kitchen Layout Step by Step in 3D

Plan a kitchen layout step by step in 3D: draw the room, place base and wall cabinets, add an island and appliances, and choose fronts and countertops.
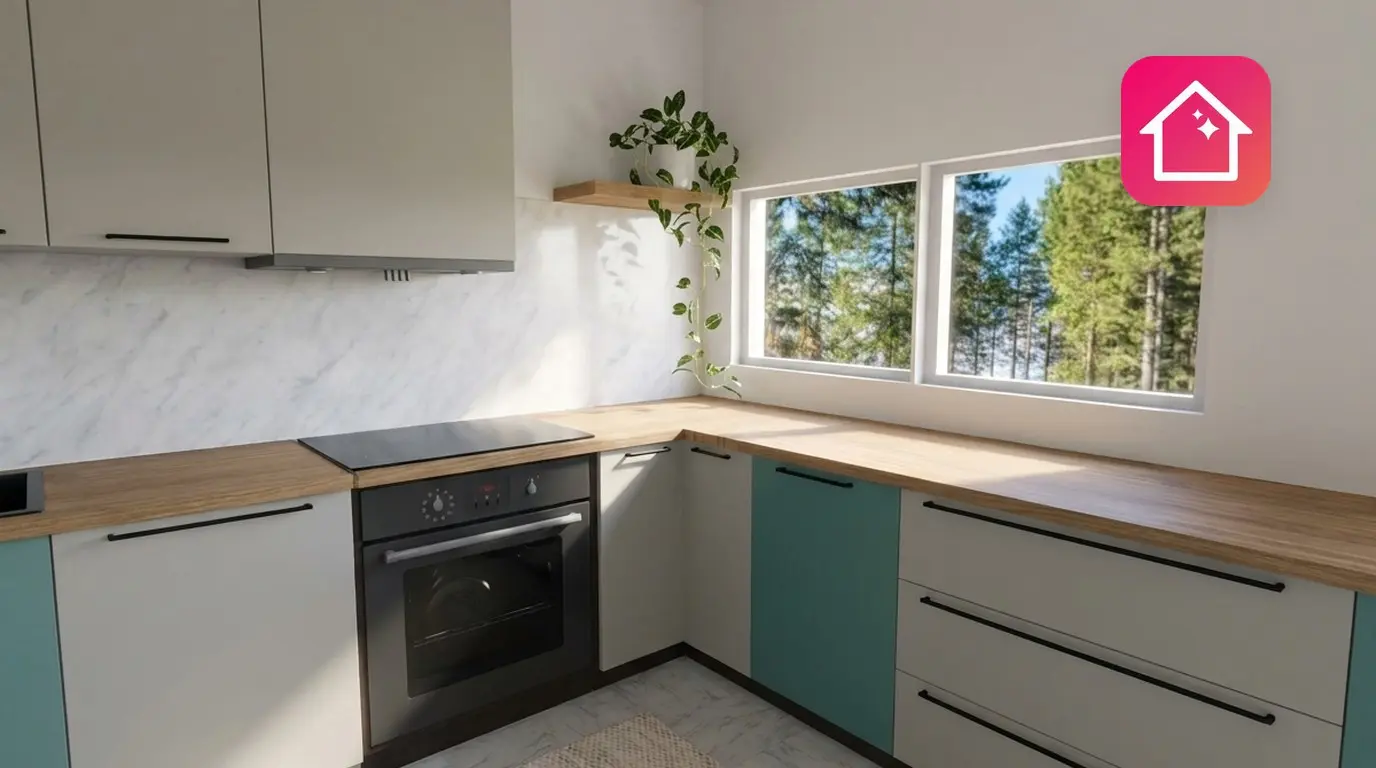
You have an empty room, a tape measure and a list of questions. Where does the sink go? Does an island fit? How high do the wall cabinets hang? Answer them on screen, before you buy a single cabinet.
Here is how to design a kitchen layout step by step: you draw the room, choose a layout shape, place base and wall cabinets along the walls, add the appliances and an island if the room allows it, and then check everything in 3D. Home Planner does all of this in one project, free to start, on iPhone, iPad, Android, Mac and Windows.
Below are the steps in the app, the common kitchen layouts with the space each one needs, and the standard measurements that make a kitchen comfortable to work in. Two related guides: how much a kitchen renovation costs and the planning stage where most kitchen mistakes happen.
How to plan a kitchen layout in Home Planner
You plan a kitchen in Home Planner in three steps: draw the room, fill it with kitchen cabinets from the catalog, and change the cabinet fronts, countertop and handles until the 3D view looks right.
- Draw the room with its real size, doors and windows.
- Add cabinets from Kitchen Collections in the catalog: base cabinets, wall cabinets, high cabinets and an island, then the appliances.
- Finish the look: select a cabinet to change its facades (the cabinet fronts), countertop, frames and handles, then apply the change to the other cabinets of the same kind.
What to prepare before you start
The plan is only as good as your measurements. You need the room size and the position of the doors, windows, water pipes and power outlets. A tape measure or a laser measure is enough.
| You need | Why |
|---|---|
| Room measurements | Wall lengths, ceiling height, and the width and position of each door and window. Cabinets are placed against real walls, so the plan must be accurate. |
| Water and power points | The sink and the dishwasher go near the water pipes; the cooktop and the oven go near the power or gas point. Moving these costs money. Gas and electrical work should be done by a qualified installer. |
| Home Planner | Free on iPhone, iPad, Android, Mac and Windows. Base, wall and high kitchen cabinets are free to add. |
| Home Planner PRO (optional) | Some catalog items and materials have a PRO mark, and automatic floor-plan recognition is part of PRO. Typing exact wall lengths is part of PRO too: without PRO, walls snap to a grid when you drag them, and your first project can use exact sizes for free. |
New to measuring? Read how to measure a room for a floor plan. With a Bluetooth® laser measure, read how to measure a room with a Bluetooth® laser measure.
Is there a free app to design a kitchen?
Yes. Home Planner is a kitchen design app that is free to start on iPhone, iPad, Android, Mac and Windows, and base, wall and high kitchen cabinets are free to add.
A free account can save up to 10 room projects (Available rooms in the app). For more, Home Planner offers an upgrade.
Which kitchen layout fits your room?
The room shape and its free wall length decide the layout. Choose the shape first: it sets where the sink, the cooktop and the refrigerator go.
| Layout | Best for | What to check |
|---|---|---|
| One-wall (straight) | Narrow rooms and studio apartments | All cabinets and appliances on one wall. Keep at least 60 cm (24 in) of countertop between the sink and the cooktop. |
| Galley (two parallel rows) | Long, narrow kitchens | Needs a room at least 220 cm (7 ft 3 in) wide: two rows 60 cm (24 in) deep and a 100 cm (40 in) aisle. Leave 100–120 cm (40–48 in) between the rows so two doors can open at the same time. |
| L-shaped | Small and medium rooms, open-plan kitchens | Use a corner cabinet in the corner. The two arms give a natural work triangle. |
| U-shaped | Medium and large rooms | Needs at least 220 cm (7 ft 3 in) of free width; 240 cm (8 ft) is comfortable. |
| With an island | Large rooms and open-plan kitchens | Keep 100–120 cm (40–48 in) of free floor on every side of the island. |
| Peninsula | Rooms too small for an island | A run of cabinets that sticks out from a wall into the room, open at the far end. |
You do not have to start from zero. In Home Planner, the Kitchen Sets category has ready-made kitchens in straight, L-shaped, U-shaped, galley (two-row) and full-wall shapes. Start from a set and change it, or build your own layout from single cabinets.
Step 1. Draw the kitchen room
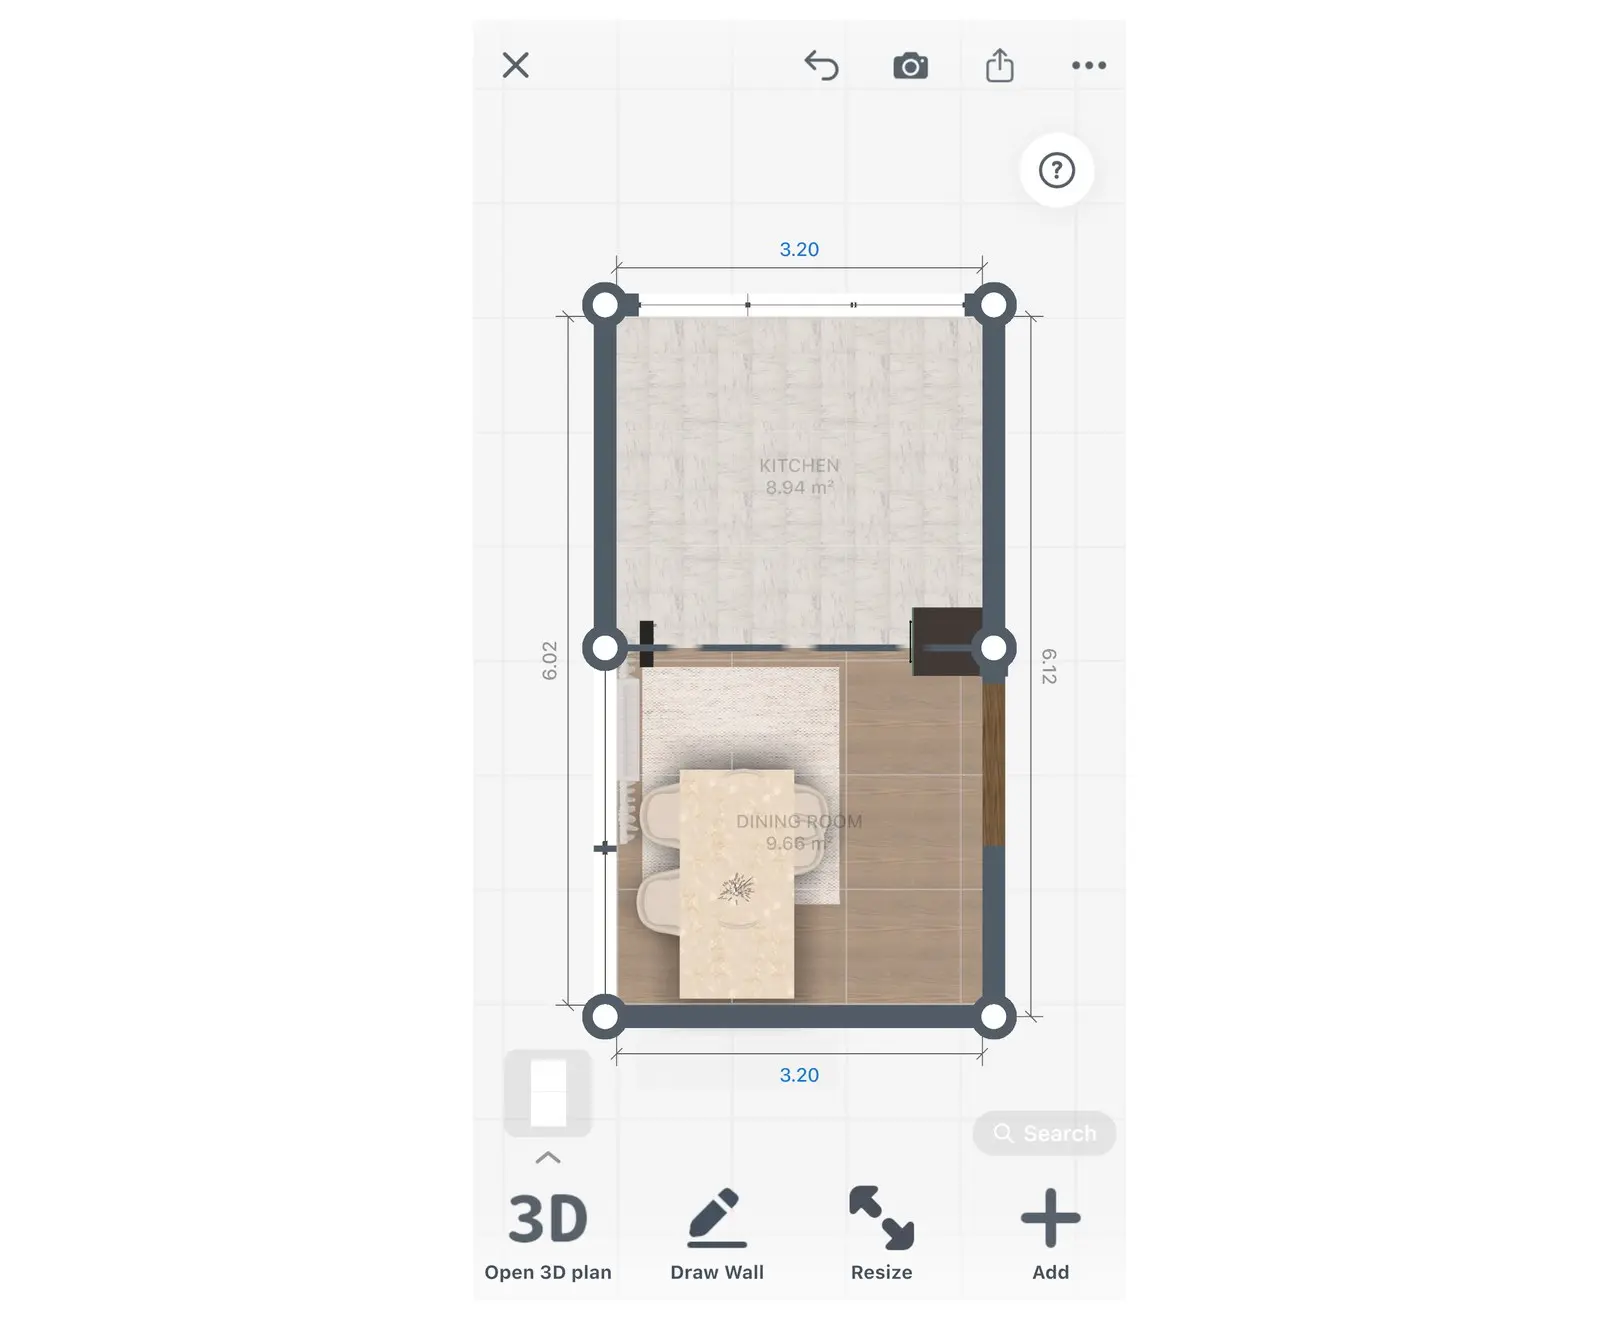
Start a new project and choose the kitchen as the room type. The catalog then shows kitchen items first.
- On the Home Planner home screen, select Add Room or Floor Plan (the first tile).
- On the Choose a room or floor screen, select Kitchen.
- On the Start from Blank screen, open the Plans tab (the Templates tab shows ready-made kitchen plans). Choose Square, Rectangular, L-shape or another shape, or Draw Walls From Scratch. You can change or refine the shape later.
- Select a wall, then the size button (the ruler icon) in the toolbar above it.
- Type the real length in Wall length and select Done. Repeat the last two steps for each wall.
- For the ceiling height, select the floor, then the three-dots button, then Ceiling height.
- Select Add Furniture at the bottom right to open the catalog (in a new project, the button can read Add). Open the Build category and add the Doors and Windows in their real positions.
No PRO? Typing wall lengths works in your first project only. In other projects, drag the walls instead: they snap to a grid.
Already have a floor plan of the whole home? Import it before you draw the kitchen. On the Choose a room or floor screen, select Floor Plan or Open Plan instead of Kitchen, then Upload Floor Plan. In a project that is already open, Upload Floor Plan shows in the 2D toolbar of a floor with no rooms yet; on a floor with rooms, select Draw Wall first. Automatic recognition of the plan needs Home Planner PRO; drawing the walls over the picture is free. After the import, compare the kitchen wall lengths with your own measurements.
Step 2. Place the base cabinets
Base cabinets stand on the floor and carry the countertop. Every other item lines up with them, so place them first, starting from a corner.
- Open the catalog again (Add Furniture) and find Kitchen Base Cabinets in Kitchen Collections (inside Kitchen when the project is not a kitchen project).
- Start with the corner cabinet (in an L-shaped or U-shaped kitchen) or with the cabinet at one end of the wall.
- Drag each next cabinet against the wall. It snaps to the wall and to the cabinet next to it.
- Place the cabinet that will hold the sink under the window or near the water pipes, and leave space for the dishwasher next to it. The filters above the list (Single, Double, Drawer, Corner-shaped, Sink Cabinet, Appliances) show one type of base cabinet at a time.
- Choose the base cabinet that will hold the cooktop: near the power or gas point, with at least 60 cm (24 in) of countertop between it and the sink.
To choose doors or drawers for a cabinet, select it, select the three-dots button on its toolbar, then Layout.
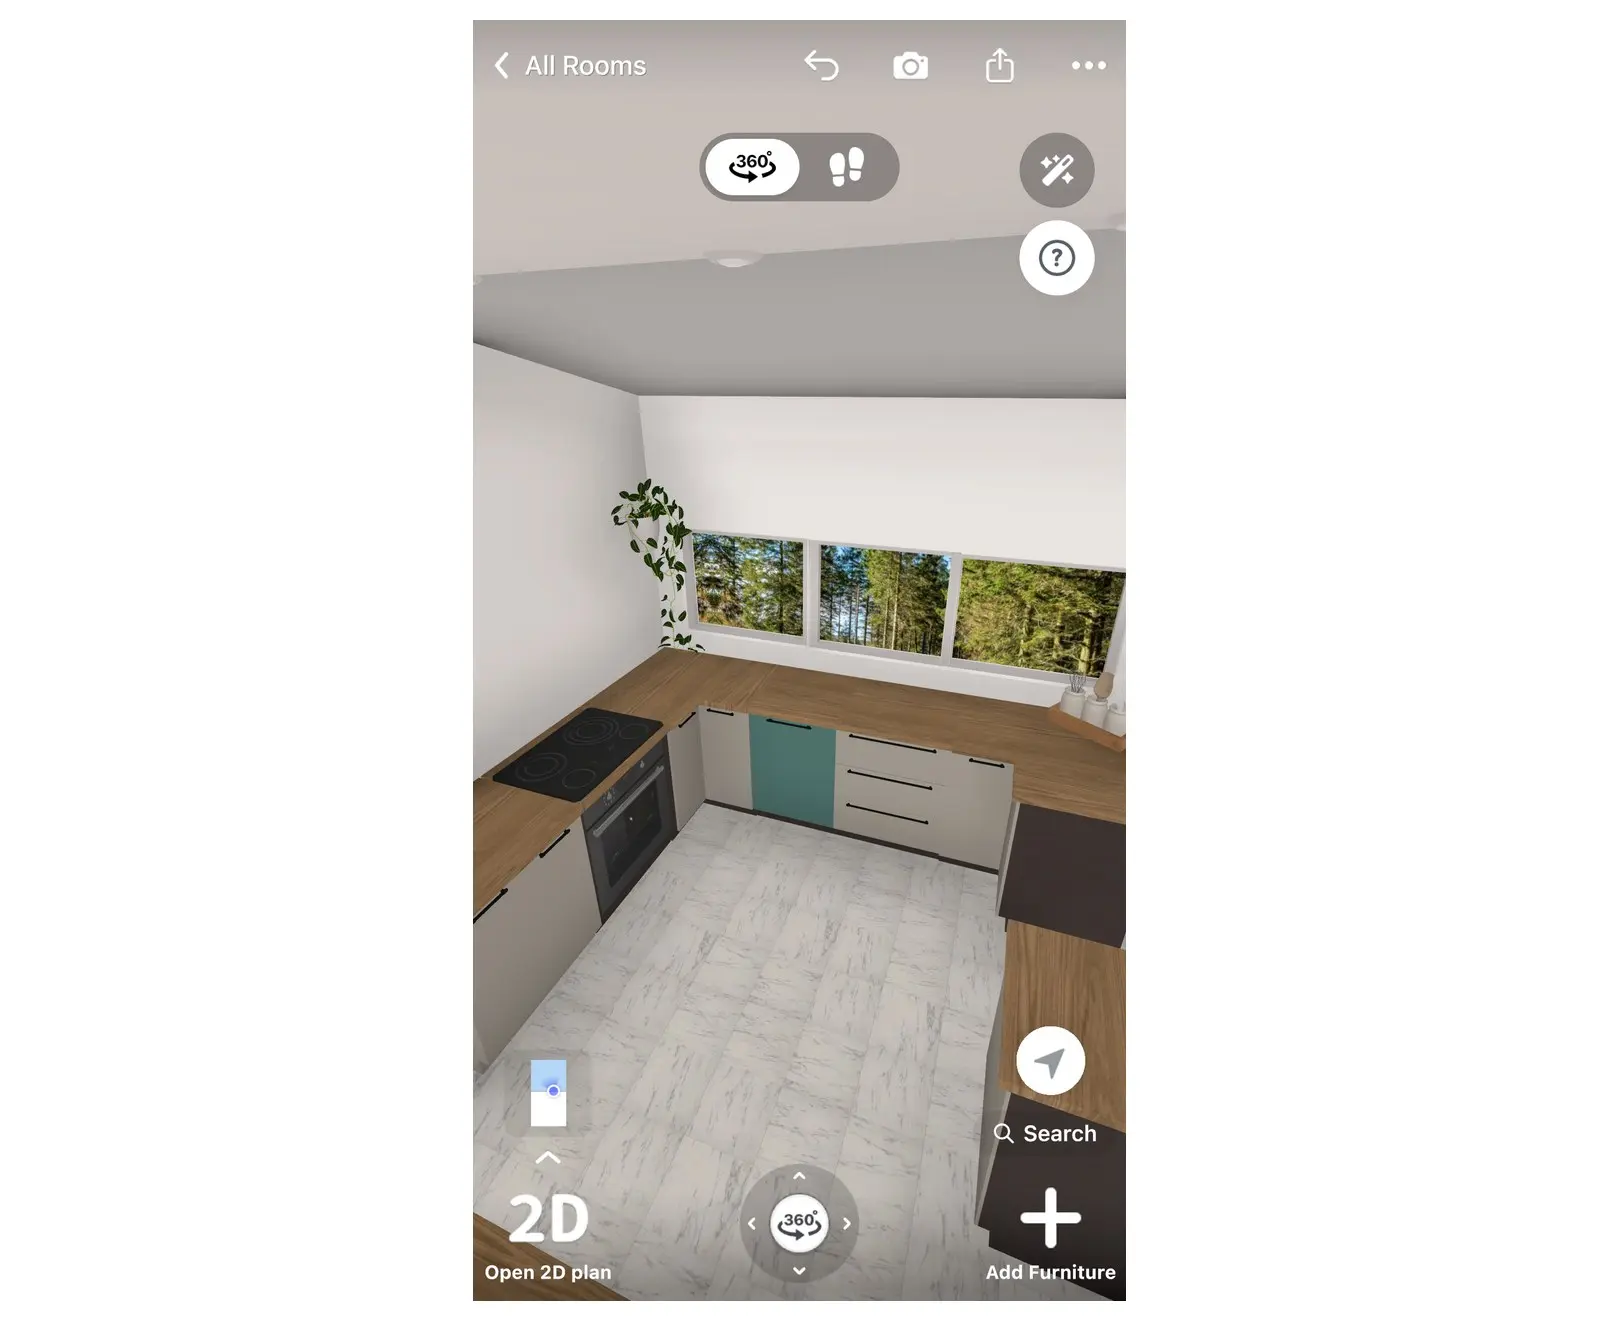
Step 3. Add wall cabinets and high cabinets
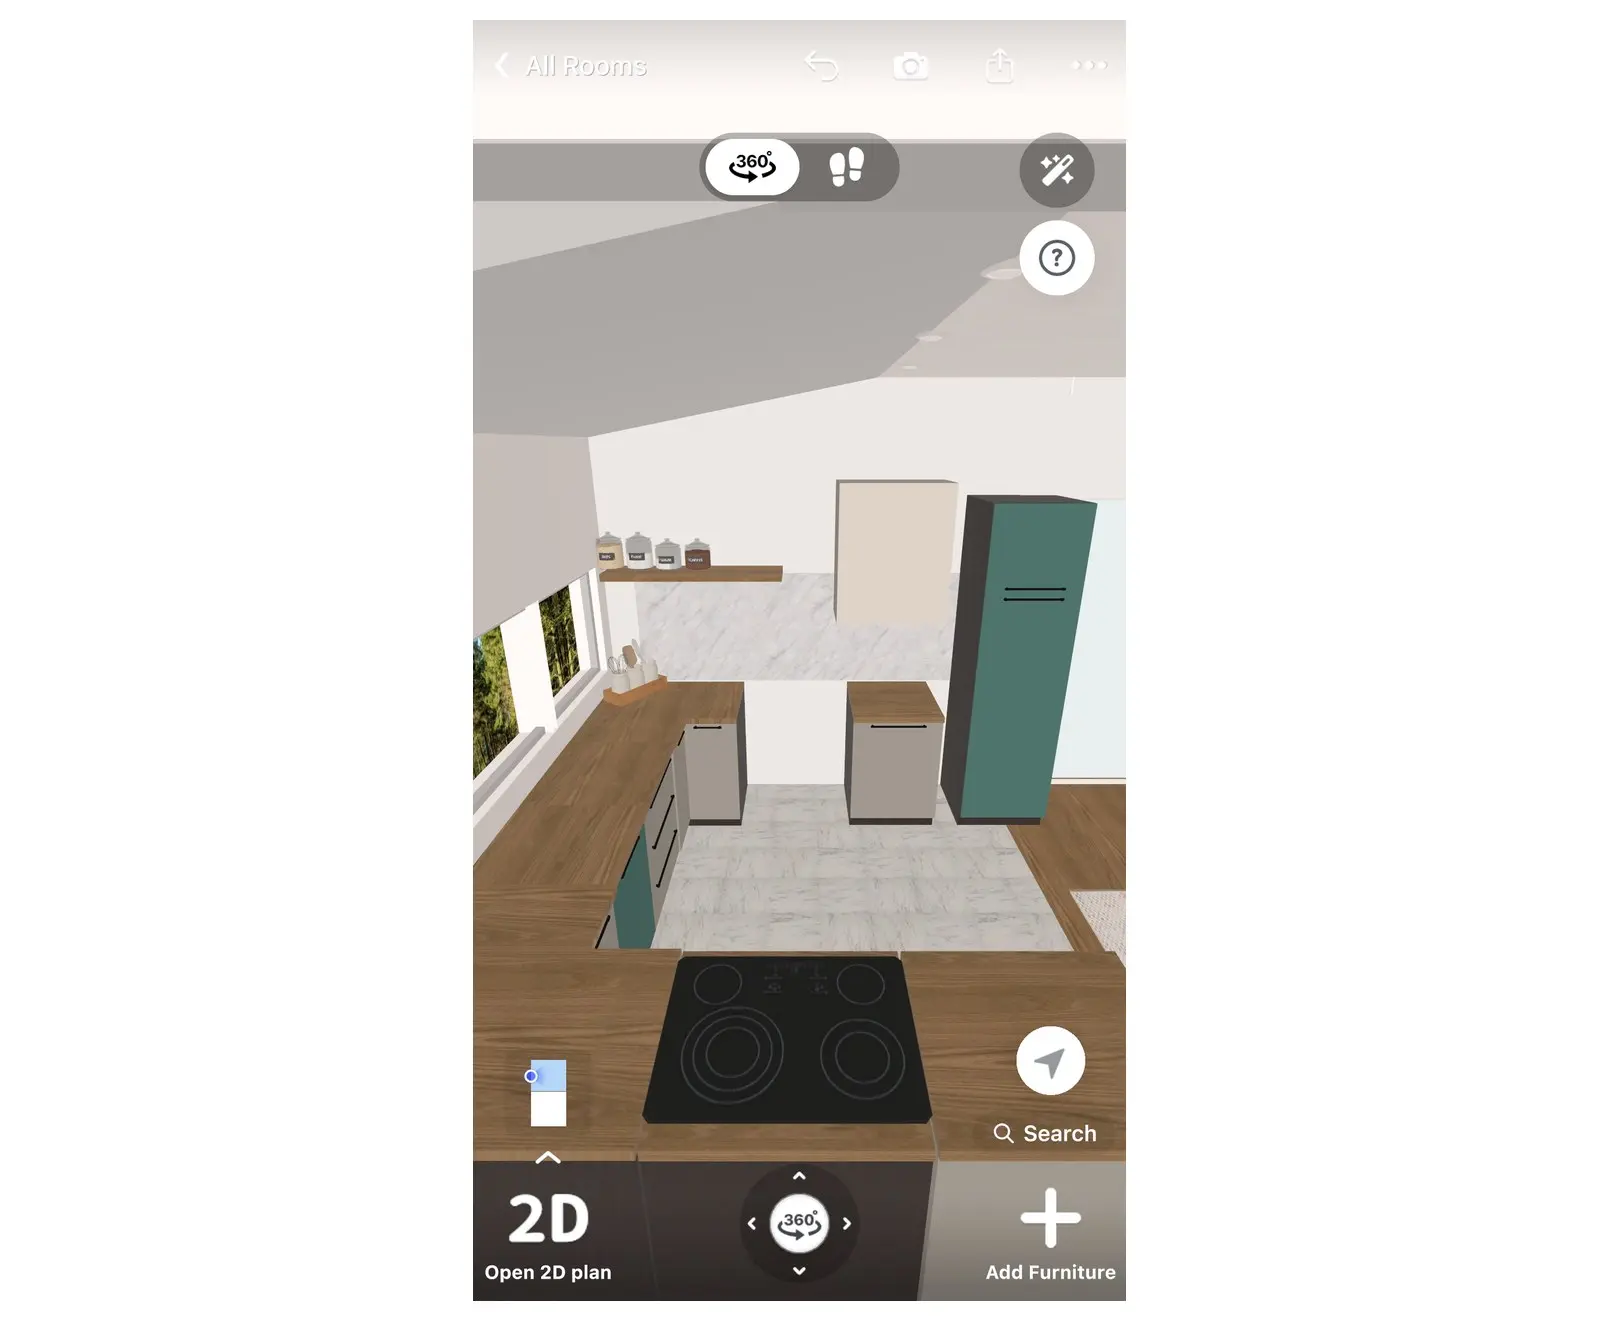
Wall cabinets hang above the countertop. High cabinets go from the floor almost to the ceiling and usually hold the oven, the refrigerator or a pantry.
- Open Kitchen Wall Cabinets in Kitchen Collections.
- Drag the first wall cabinet onto the wall above the base cabinets. Home Planner hangs it at a standard height; the next wall cabinets line up with it.
- To fill the wall exactly, use the size icons above the list: they show wall cabinets of one width at a time.
- Leave the wall above the cooktop cabinet you chose in Step 2 free for the cooker hood.
- Add Kitchen High Cabinets at the end of a row of cabinets.
Common mistake: a high cabinet in the middle of the countertop cuts your work surface in two. Put it at the end of a row instead.
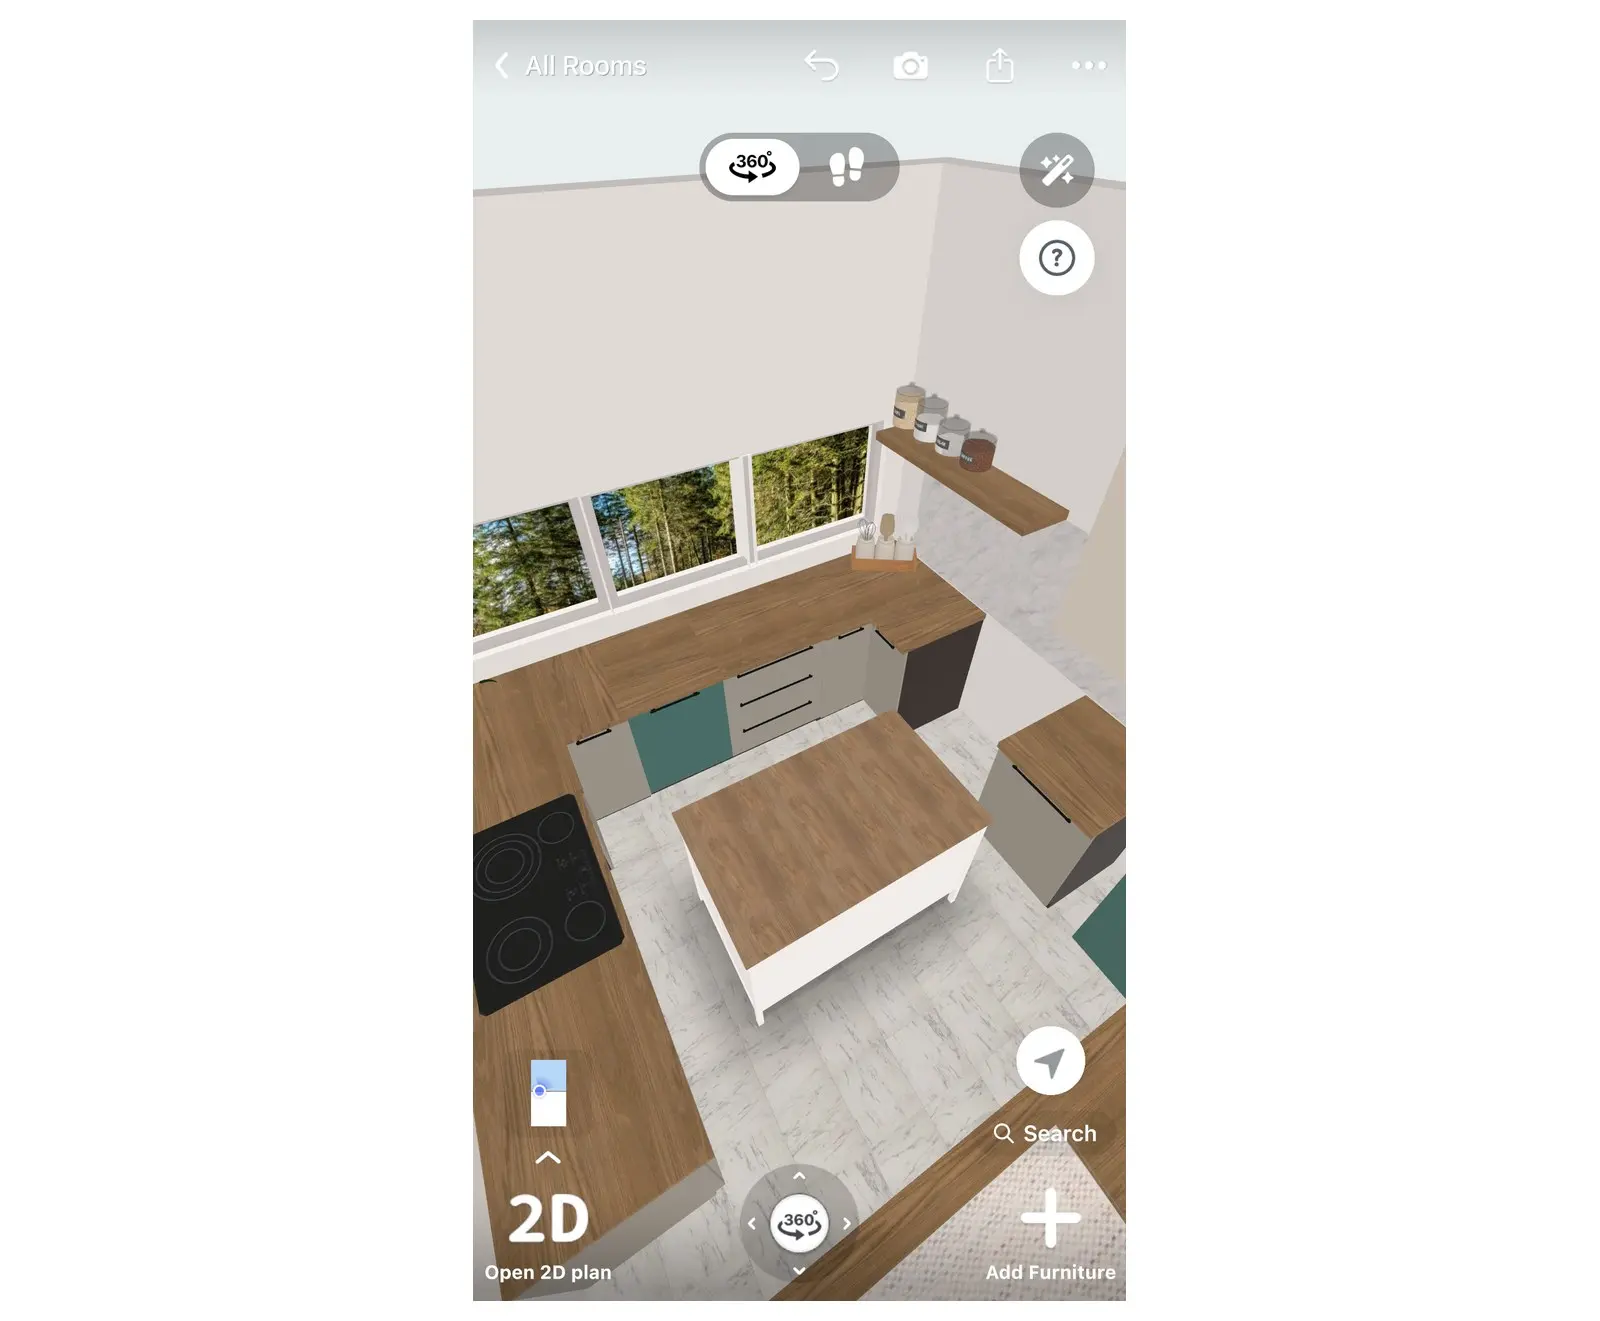
Step 4. Add a kitchen island
Home Planner has a Kitchen Island category with ready-made islands. Add one only when the room leaves enough free floor around it.
- Open Kitchen Island in Kitchen Collections.
- Drag the island into the middle of the room.
- Check the distance from the island to the cabinets on every side in the 2D plan: 100–120 cm (40–48 in) is comfortable.
- For seating, leave at least 30 cm (12 in) of countertop overhang and add bar stools from Tables and Chairs.
When you select an island, Home Planner shows a Complete the island button. It suggests bar stools, ceiling lights and items for the countertop, and places the one you choose next to the island.
Step 5. Add appliances and the sink
Place the appliances after the cabinets, so each one fits a cabinet opening or a gap in the row.
- Refrigerator, oven, cooktop, cooker hood, dishwasher: the Kitchen Appliances category (under Electronic Devices), or type the name in Search. Base cabinets with a built-in appliance are under the Appliances filter of the base cabinets.
- Sink: use a base cabinet from the Sink Cabinet filter (see Step 2).
- Match the widths: a 60 cm (24 in) dishwasher or cooktop needs a 60 cm (24 in) gap or cabinet.
- Countertops and Backsplash: in Kitchen Collections.
When you select a base cabinet, Home Planner shows a Complete the kitchen button. It suggests a cooker hood, a kettle, a toaster, a coffee maker, wall rails, LED lights and kitchen decor, and places the one you choose on or above the cabinet.
Now check the distances. Keep the sink, the cooktop and the refrigerator close to each other: this "work triangle" saves steps when you cook. Each side of the triangle is usually 120–270 cm (4–9 ft).
To plan where the outlets and the lights go, read how to design your lighting and outlets.
Step 6. Choose fronts, countertop and handles
Now the kitchen gets its look. Select a kitchen cabinet to change it. The change can go to that one cabinet, or to every cabinet of the same kind in the room.
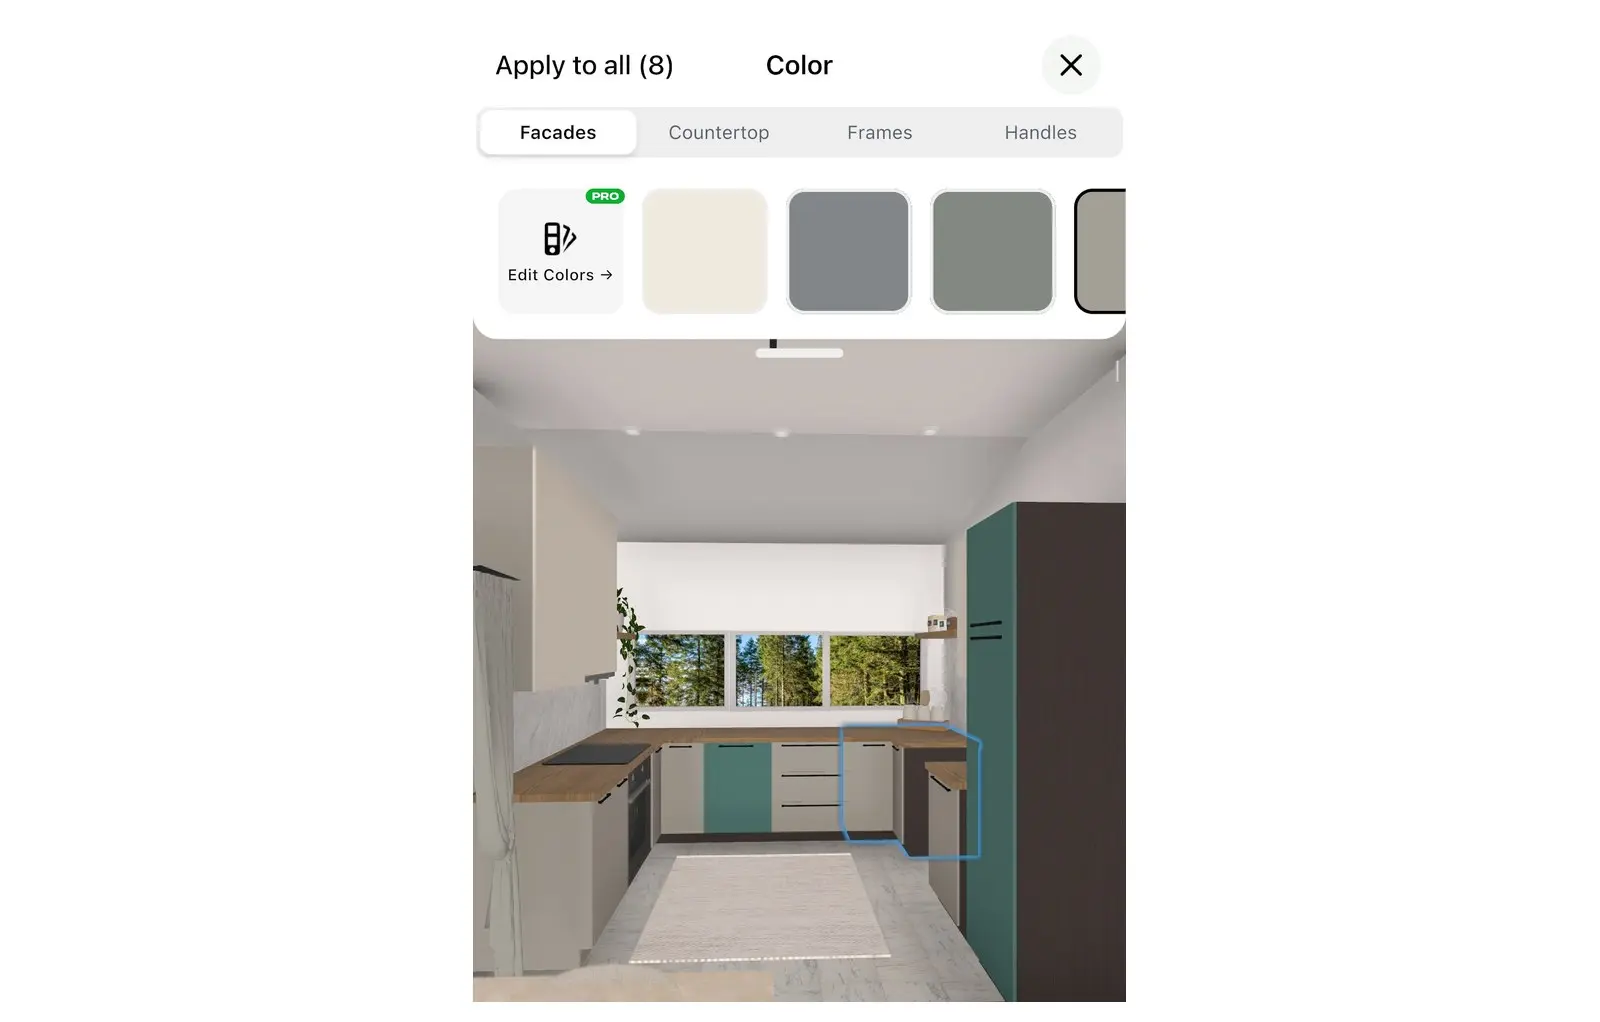
- Select a cabinet and select the round color swatch on its toolbar. The Color window opens. The tabs are Facades (the cabinet fronts), Countertop, Frames and Handles.
- Choose a front color or material on Facades. Base and wall cabinets have their own facades, so a two-tone kitchen is easy.
- On the Countertop tab, choose marble, granite, wood or tile.
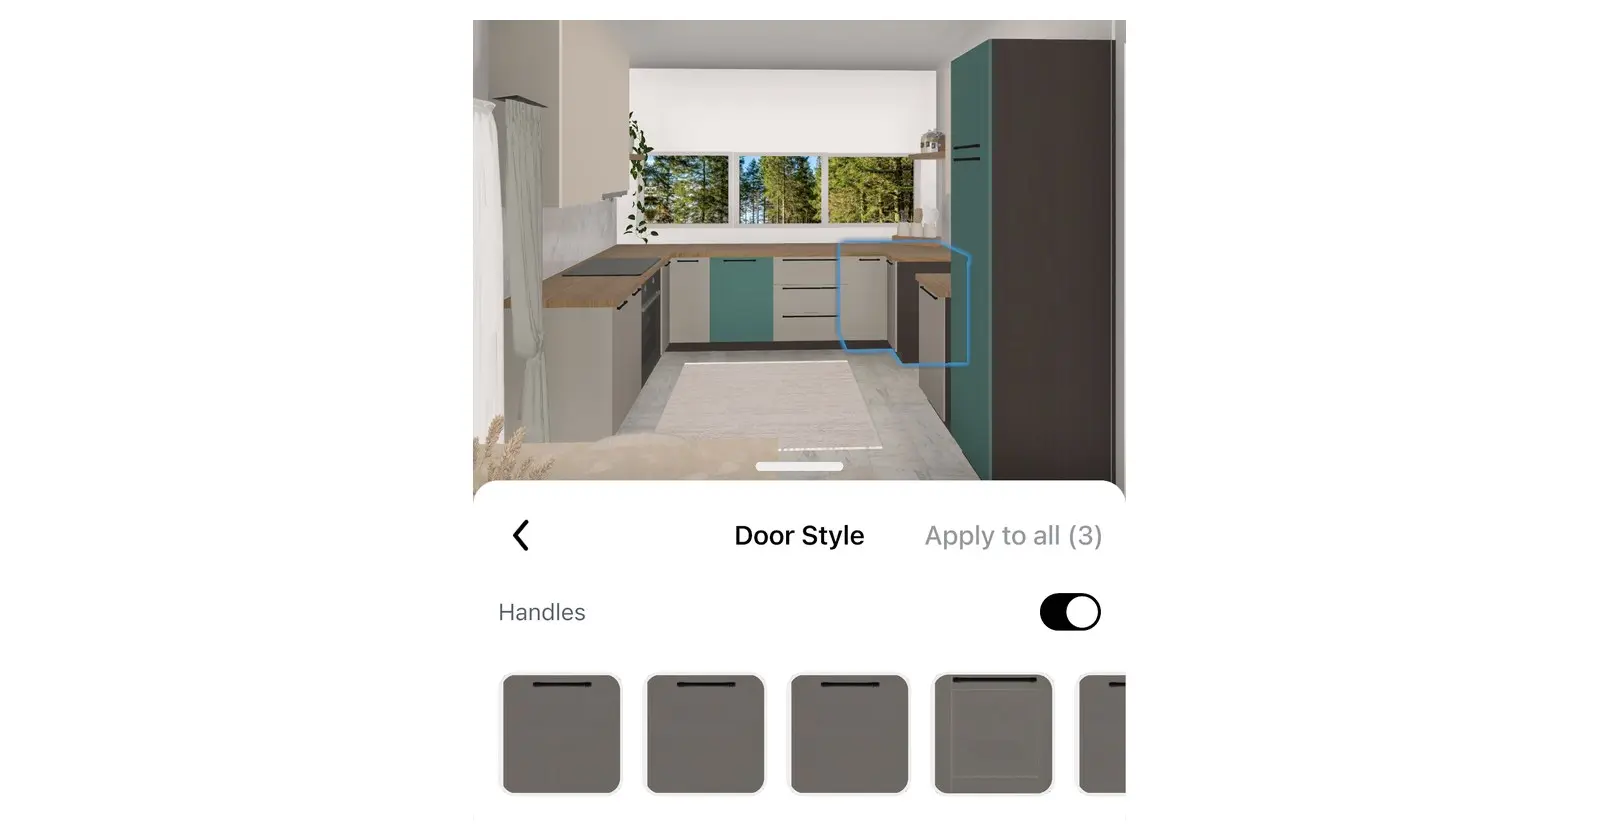
- Select Apply to all in the top left corner of the same window; the number next to it shows how many cabinets will change.
Apply to all changes every cabinet of the same kind in the room. Select a base cabinet to change the base and high cabinets, then a wall cabinet to change the wall cabinets.
Next, the door style. With a cabinet selected, select the three-dots button on its toolbar, then Door Style. Each tile shows a door front, for example a flat slab front or a framed front: select the one you want. The tile changes the selected cabinet. To give the same front to every cabinet of the same kind, select Apply to all in the same window. On the same screen, turn the Handles switch off for a handleless kitchen.
Step 7. Check the kitchen in 3D
A 2D plan hides some problems: a door that hits the refrigerator, a wall cabinet over the window, a walkway that is too narrow. The 3D view shows them.
- In the 2D plan, select Open 3D plan at the bottom left, then walk around the kitchen.
- Check that each door can open fully: the oven, the dishwasher, the refrigerator and the room door must open without hitting anything. To test the room door, select it, then the three-dots button, then Open door.
- Check the light: add lights from the Lighting category, for example pendant lights over the island.
- To fix a size or a position, select the floor, then the three-dots button, then Go to 2D.
A door hits a cabinet? Move the item or leave more space. Then check the door again in 3D.
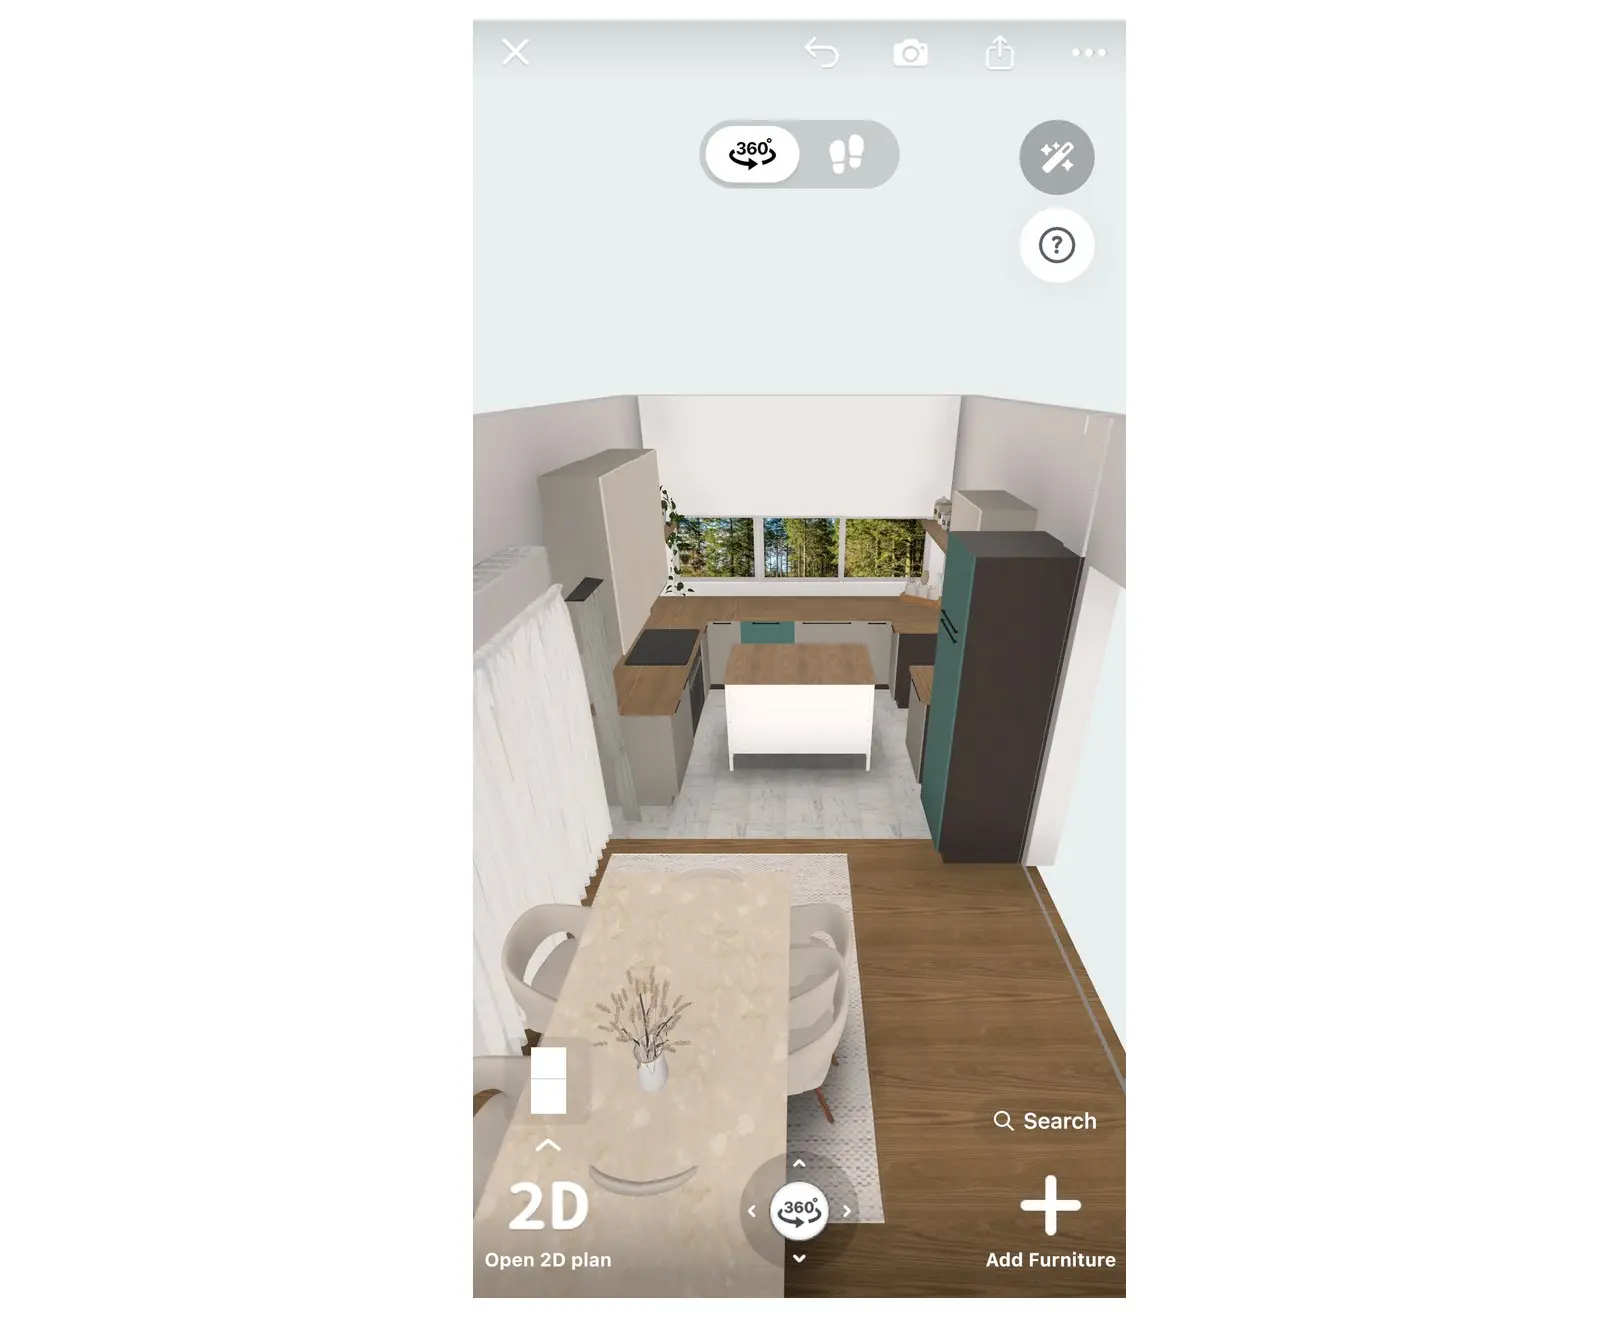
When the layout is ready, select the share icon in the right toolbar of the editor (it has no caption). In the menu, Share invites your family or a kitchen fitter into the project, and PDF makes a floor plan with measurements.
What are the standard kitchen measurements?
A comfortable kitchen has 100–120 cm (40–48 in) of walkway, base cabinets 60 cm (24 in) deep, an 86–92 cm (34–36 in) countertop and a work triangle of 4–8 m (13–26 ft) in total. These are typical sizes, so check the exact sizes of the cabinets and appliances you buy.
| What | Typical size |
|---|---|
| Base cabinet depth | 60 cm (24 in) |
| Countertop height | 86–92 cm (34–36 in) |
| Gap between countertop and wall cabinets | 45–60 cm (18–24 in) |
| Walkway between cabinet rows or around an island | 100–120 cm (40–48 in) |
| Countertop on each side of the cooktop | At least 30–40 cm (12–16 in) |
| Work triangle, sum of the three sides | 4–8 m (13–26 ft) |
A table of sizes tells you the rules. Your own room tells you if they fit. Draw your kitchen in Home Planner, place the cabinets, and walk through it in 3D before you order anything.
Trademark notice. Home Planner is not affiliated with, endorsed or sponsored by Apple Inc., Google LLC, Microsoft Corporation or Bluetooth SIG, Inc.; their names and marks belong to their owners. The Bluetooth® word mark and logos are registered trademarks owned by Bluetooth SIG, Inc. iPhone, iPad and Mac are trademarks of Apple Inc., registered in the U.S. and other countries. Android is a trademark of Google LLC. Other trademarks are the property of their respective owners.
Try it on your own project
Free app for iPhone, iPad, Mac, Android and Windows.