How to Measure a Room for a Floor Plan, Step by Step

How to measure a room for a floor plan: walls, ceiling height, doors, windows and diagonals, then enter them in Home Planner for a to-scale 2D and 3D plan.
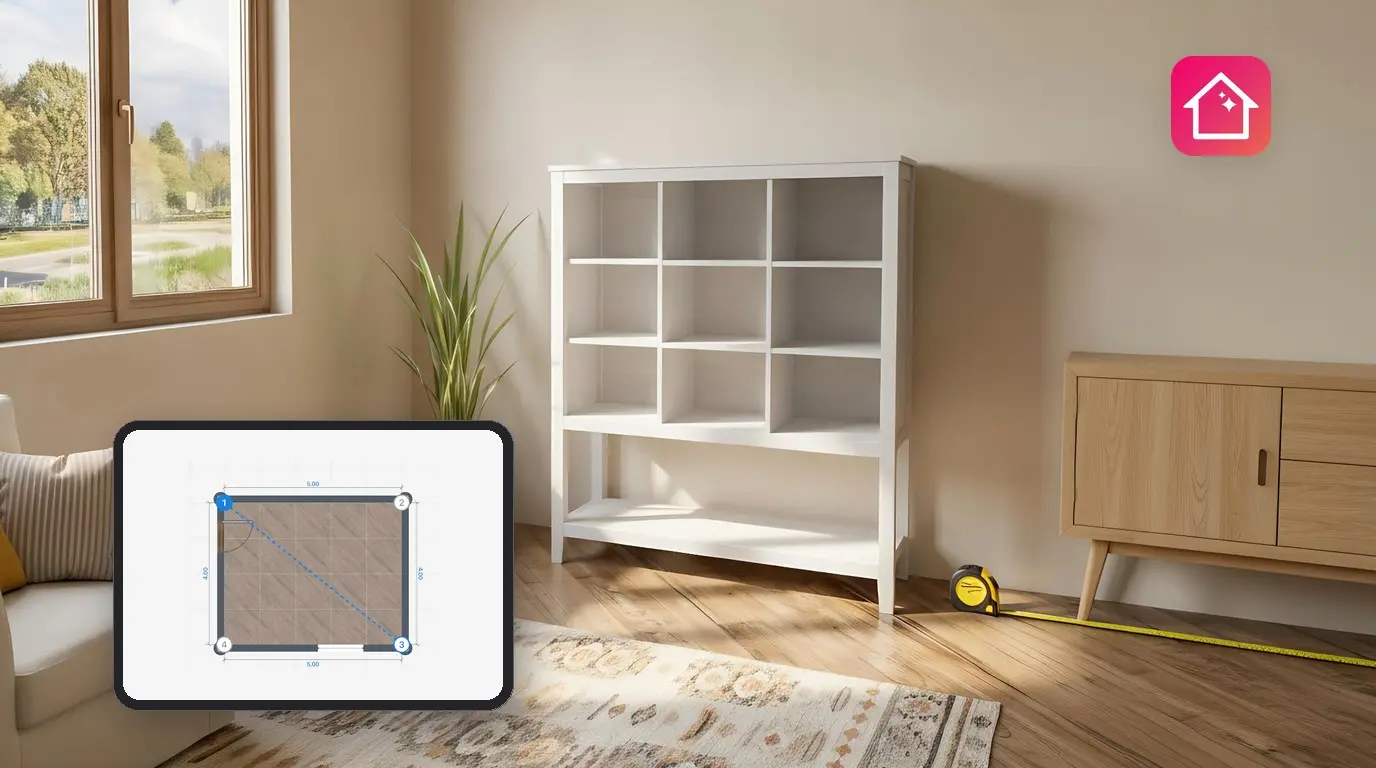
A floor plan is only as good as the numbers you type into it. Measure at floor level, and every wall comes out short by the skirting board. Skip the diagonal, and a room that is not square turns into a perfect rectangle on the screen. The wardrobe fits in the plan and not in the room.
This guide shows how to measure a room for a floor plan, step by step: the walls, the ceiling height, the doors and windows, and the diagonals that fix the shape of the room. You need a tape measure or a laser measure, a pencil and about 15 minutes per room.
At the end, you type the numbers into Home Planner and get a 2D floor plan and a 3D model of the room with your real sizes. Prefer a phone scan or a Bluetooth® laser measure? This guide links to the detailed guides for both.
Which measurement goes first when you measure a room?
The sketch goes first, then the walls, clockwise from corner 1. After the walls come the ceiling height, the doors and windows, and the diagonals.
- Sketch the room on paper and number the corners clockwise.
- Measure each wall, the ceiling height, every door and window, and one or more diagonals.
- Enter the numbers in Home Planner: the walls take the exact lengths, and the diagonals correct the angles.
The fixed order keeps every number next to the wall it belongs to, so nothing gets mixed up when you type.
Before you start
A tape measure and a sketch are enough.
| You need | Why |
|---|---|
| A tape measure (5 m / 16 ft or longer) or a laser measure | A laser measure is faster on long walls and you can use it alone. A tape is fine for a small room. |
| Paper and a pencil | You write each number on the sketch next to the wall it belongs to. |
| Home Planner on a phone, tablet or computer | Home Planner turns the numbers into a 2D plan and a 3D model. |
| Home Planner PRO | Typing exact wall and room sizes is part of PRO; without it, walls snap to a grid when you drag them. You can type exact sizes in one project for free: the first one where you use them. The size window shows Exact size — free for this room. |
Follow your device maker's safety instructions. Never point a laser at anyone's eyes.
Tape, laser or phone scan?
All three ways end in a plan with real sizes. They differ in speed and in what you need.
| Method | Best for |
|---|---|
| Tape measure | Any room, no extra devices. This guide. |
| Bluetooth® laser measure (selected models) | Long walls, many rooms, working alone. The reading goes straight into the plan on iPhone, iPad, Mac and Android (not on Windows). |
| Phone scan (LiDAR or AR) | A quick plan of a furnished room with an iPhone, iPad or Android phone |
Detailed guides: measure a room with a Bluetooth® laser measure and measure a room with your phone (LiDAR). The rules below apply to all three: what to measure, where to hold the tape, and how to check the shape of the room.
Step 1. Sketch the room
The sketch does not need to be to scale. Its job is to give every number a place.
- Draw the outline of the room from above, as you see it when you stand in the doorway.
- Number the corners clockwise: 1, 2, 3 and so on. Start at the corner to the left of the door.
- Mark every door, window, radiator, column and built-in cupboard on the walls.
Step 2. Measure the walls
Measure each wall on the inside of the room, from corner to corner, along the wall surface.
- Start at corner 1 and go clockwise, so the numbers on your sketch follow the same order as the walls.
- Hold the tape at about 1 m (3 ft) above the floor.
- Keep the tape straight and level. A sagging tape adds length.
- Write each length to the nearest centimetre or 1/4 inch on the sketch, next to its wall.
- Measure short wall parts too: the sides of a chimney breast, a recess or a corner cut.
- Measure the wall thickness in a doorway (the depth of the opening) and write it on the sketch.
Common mistake: measuring along the floor. Skirting boards make the wall look shorter, and every wall in the plan comes out too short.
Measure from inside the room, not from the outside of the house. The plan in Home Planner uses the room side of each wall.
Step 3. Measure doors and windows
For each door and window, you need two things: where it starts on the wall, and how big it is.
| Measure | From – to |
|---|---|
| Distance from the corner | From the nearest corner to the edge of the opening (the frame edge) |
| Width | From one edge of the opening to the other |
| Height | From the floor to the top of the opening |
| Sill height (windows) | From the floor to the bottom of the window opening |
Measure the opening in the wall, not the door leaf or the window sash. On the sketch, write the distance from the corner first and the width second. Then you never mix them up.
Step 4. How to measure ceiling height
Measure from the finished floor to the ceiling, in two or three places in the room.
- Put the end of the tape (or the back of the laser measure) on the floor, next to a wall.
- Measure straight up to the ceiling. With a tape, a second person helps; with a laser measure, aim the beam at the ceiling.
- Repeat in another corner. Old floors and ceilings are often not level.
- In a room with a flat ceiling, write the smallest value on the sketch. Measure beams and lowered ceiling parts separately.
- Sloped ceiling: measure the height at the low wall, the height at the highest point, and the floor distance between them. Write all three.
Step 5. Measure the diagonals
A diagonal is the distance between two opposite corners. This step is easy to skip, and it is the one that fixes the shape. The same four walls can make a rectangle or a parallelogram. Only a diagonal tells the two apart.
- Measure from corner to corner across the room, on the inside of the walls, at the same height for both ends.
- Write the length on the sketch with the corner numbers, for example "Diagonal 1–3".
- For a room with four corners, one diagonal is enough. Measure the second one as a check: if both diagonals are equal and opposite walls are equal, the room is a rectangle.
- For a room with more corners, measure more diagonals. A room with n corners needs n − 3 diagonals: an L-shaped room with 6 corners needs 3. Pick corner pairs where the line stays inside the room. In an L-shaped room, measure from the inner corner to the three corners that are not next to it.
Furniture in the way? Measure at a height where the line between the corners is free, or use a laser measure. For a flat, repeat Steps 1–5 in every room and write the wall thickness at each doorway.
Enter the measurements in Home Planner
You draw the room once, then replace the drawn sizes with your measurements.
Wall lengths
- Open your project in the 2D plan. Draw the room, or start from a room shape.
- Select Edit Walls in the bottom toolbar. A new project has no such button: its walls are already editable.
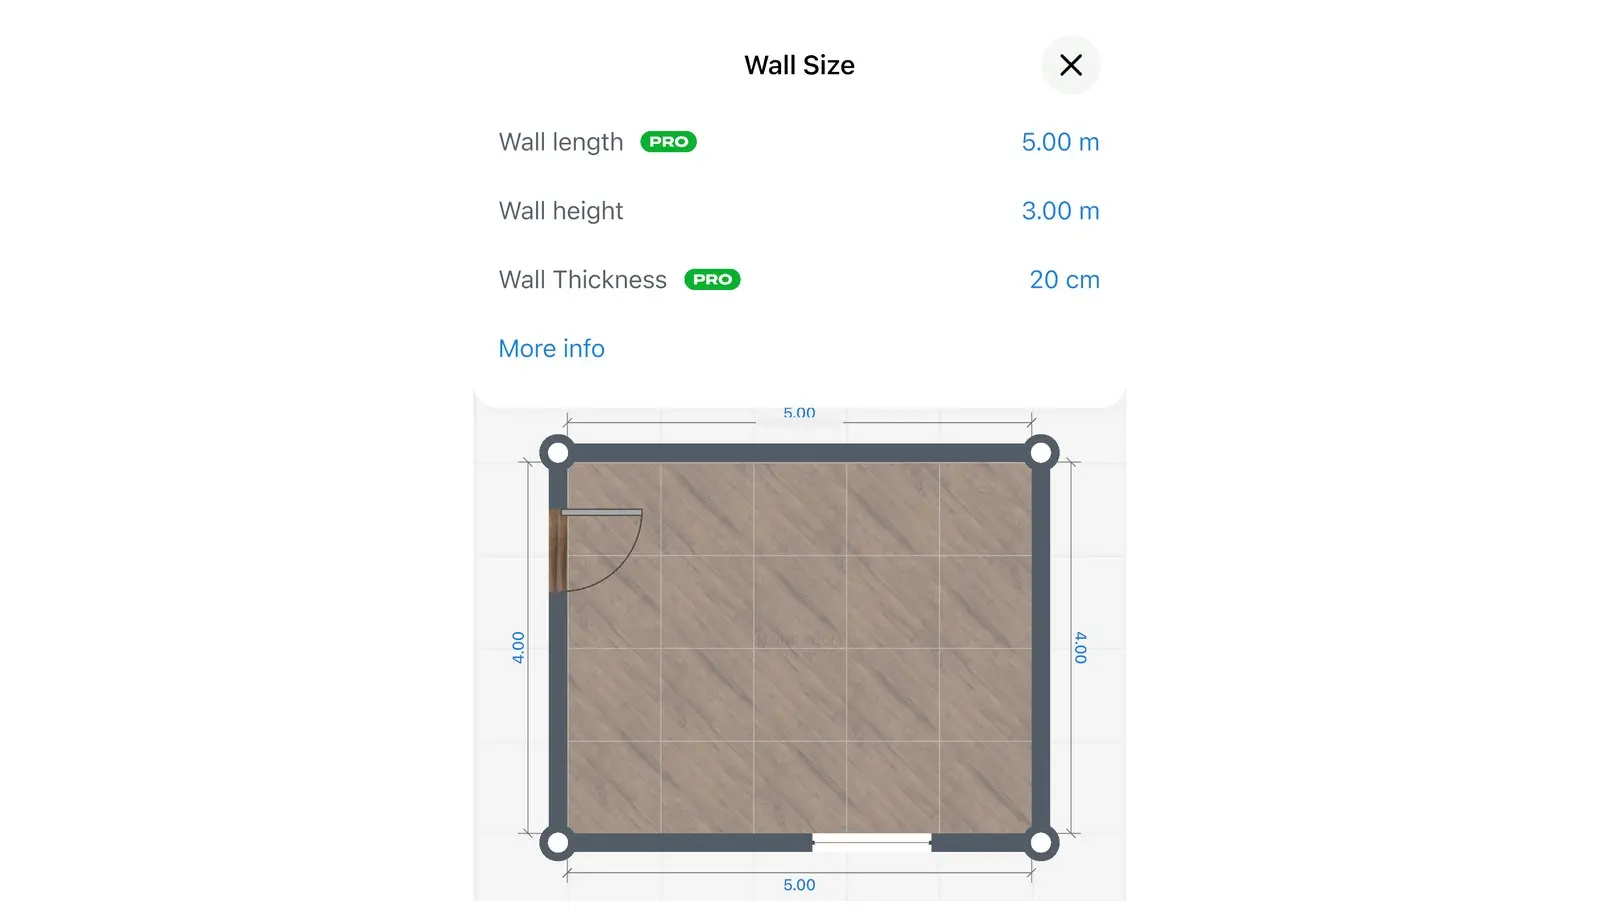
- Select a wall, then the size button (the ruler icon) in the toolbar above it. The Wall Size panel opens with Wall length, Wall height and Wall Thickness.
- Type the length from your sketch and select Done. Do the same for each wall, in the order of your corner numbers.
Type the wall thickness from your sketch in Wall Thickness. Wall height is the height of this wall only; you set the ceiling height for the whole room in the next step. Wall length and Wall Thickness show a PRO label, and the label stays there even when you have PRO.
A shortcut: select the length number on a wall in the plan, and the size keypad opens for that wall.
Ceiling height
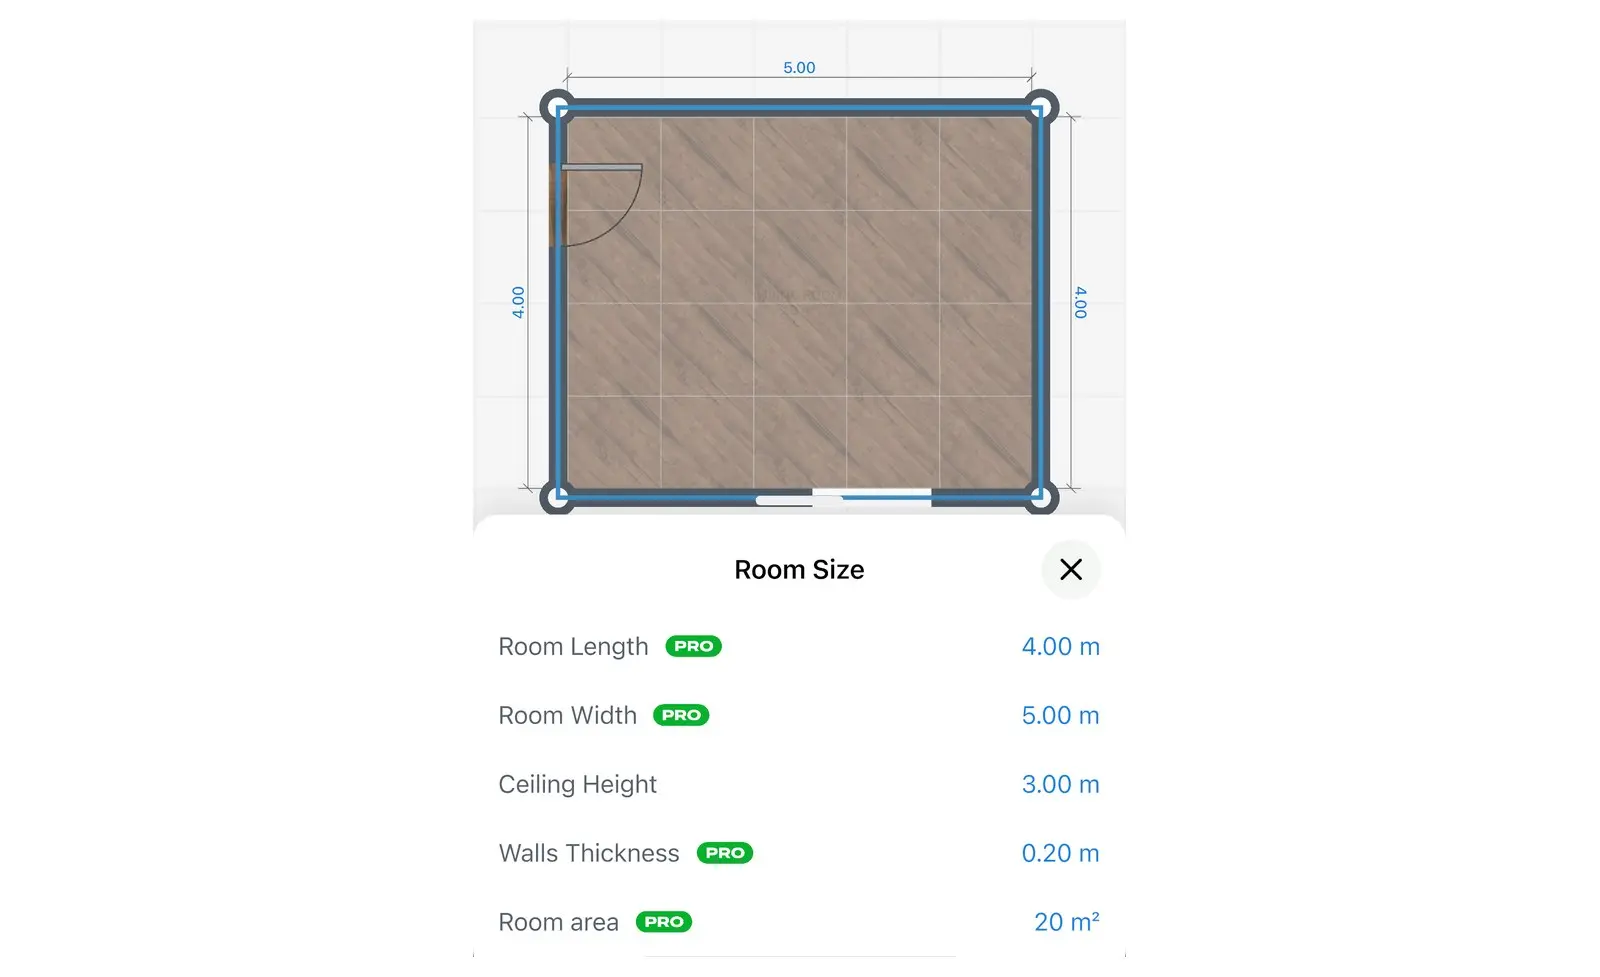
- In the 2D plan, select the room (if you see Edit Walls, select it first), then the size button. Or switch to 3D, select the room and select the size button. The Room Size panel opens.
- Type your measurement in Ceiling Height. The panel also shows Room Length, Room Width, Walls Thickness and Room area.
Doors and windows
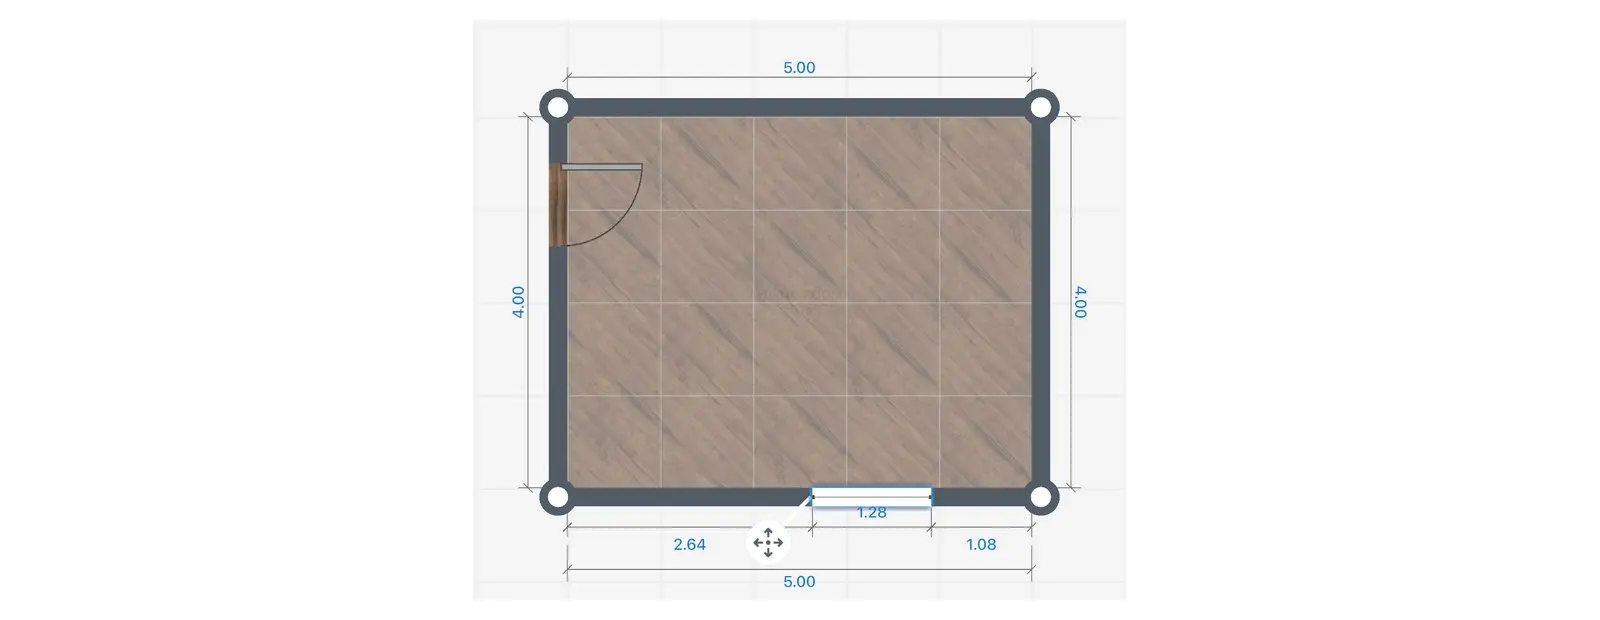
- Select the wall, select the + button, then Add Door or Add Window. The door or window appears on the wall. Drag it along the wall.
- Select the distance number between the opening and the corner, and type the distance from your sketch (PRO).
- Select the door or window, then the three-dots button on its toolbar, then Information. Type the Width and Height. Changing the size of some doors and windows needs PRO.
- Sill height: switch to 3D or open the wall view of that wall. Select the window, then the three-dots button on its toolbar, then Position. Type the sill height in Bottom: it is the height of the window above the floor.

Diagonals
A diagonal you type in Home Planner corrects the angles of the room, so the plan matches your measurements. For a room with angled walls, see how to draw angled walls on a floor plan.
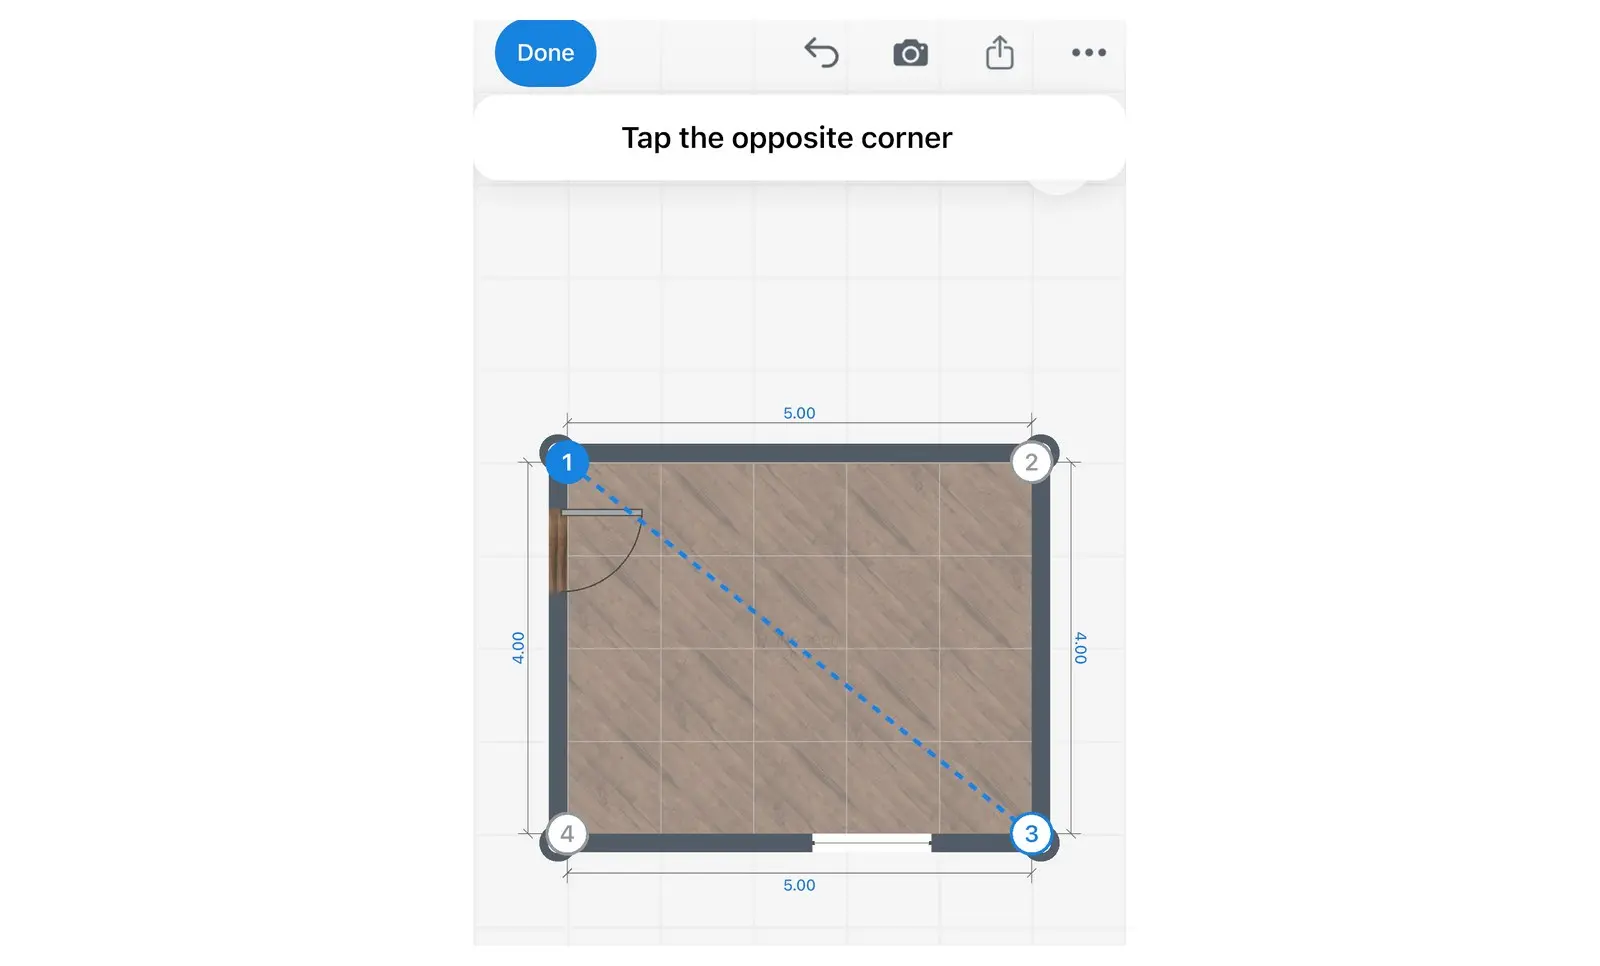
- Select Edit Walls in the bottom toolbar (a new project has no such button: walls are already editable), then select the room. The corners show their numbers.
- Select Diagonal. Select the first corner, then the opposite corner.
- Type the diagonal length from your sketch and select Done. Home Planner moves the corners so that the room has your exact wall lengths and diagonal. You see Room shape updated.
Check the corner numbers: the app's numbers can differ from your sketch. Match the corners by wall length before you type.
Other ways to start: select a corner and then Diagonal from here. On a phone in portrait, the Diagonal button can be hidden: use Diagonal from here instead. If the size keypad of a wall shows Corners aren't exact yet, use the diagonal link under it.
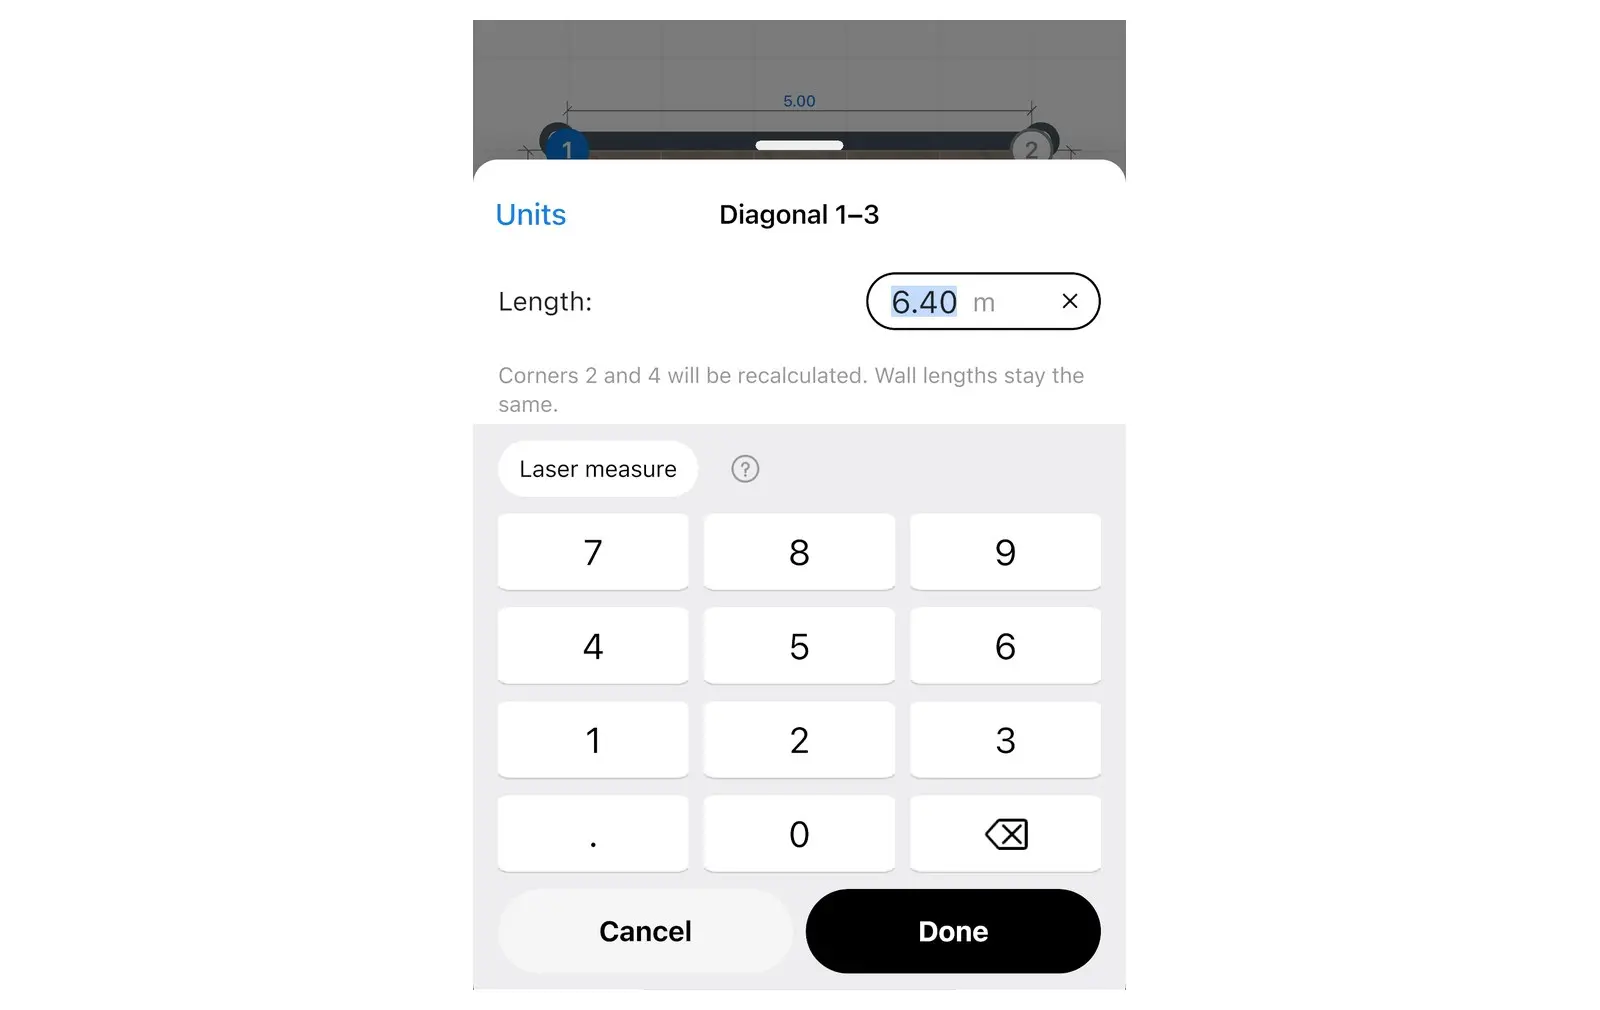
A saved diagonal holds the room shape. When you later change a wall, the app keeps the corners where you measured them. To remove a diagonal, open it and select Delete.
What if the app does not accept a diagonal?
Read the message: it tells you what to check. Home Planner compares every diagonal with your wall lengths, and the message names the problem.
| In the app | What it means | What to do |
|---|---|---|
| These lengths can't form a triangle. Check the measurements | The diagonal is longer than the two walls between its corners together, or too short. | Measure the diagonal and the two walls again. |
| Off by …. Re-measure one of the diagonals | Two diagonals of the same room do not agree with each other. | Measure both diagonals again at the same height. |
| These corners share a wall | You selected two corners at the ends of one wall. | Select two corners that are not next to each other. |
| This line leaves the room | The line between the corners goes outside the room, for example in an L-shaped room. | Choose other corners, or measure this part of the room as walls. |
| The neighboring room will change too | The room shares a wall with another room, and that wall moves. | Confirm to move both rooms, or cancel and check the measurements. |
| Couldn't refine the room shape | The app could not move the corners without breaking the plan. | Check the wall lengths, then enter the diagonal again. |
Measure a room with your phone or a laser measure
A phone scan and a Bluetooth® laser measure skip most of the typing. The rules stay the same: measure inside the room, go clockwise, check the shape.
- Phone scan: Room Scan builds the plan from your camera. On an iPhone or iPad with LiDAR the scan is automatic and more precise. On an Android phone with AR support, or an iPhone without LiDAR, you mark the floor corners and add doors and windows with buttons. The app marks Room Scan PRO: without PRO you can look around the scanned room in 3D, and editing the plan needs PRO. See the phone scan guide.
- Bluetooth® laser measure: each reading goes straight into the wall you selected, and the app guides you around the room, diagonals included. It is a PRO feature on iPhone, iPad, Mac and Android. See the laser measure guide.
A scan is fast, but check it. Measure every wall and the ceiling height with a tape afterwards, especially at corners and behind furniture.
How do you measure a room accurately?
Hold the tape about 1 m (3 ft) above the floor, keep it straight, measure the openings and not the doors, keep one unit, and measure the diagonals. Five habits cause most errors in a floor plan.
| Mistake | Result in the plan | How to avoid it |
|---|---|---|
| Measuring at floor level | Walls too short by the skirting board | Measure at about 1 m (3 ft) above the floor |
| A sagging or slanted tape | Walls too long | Keep the tape straight; use a laser measure on long walls |
| No diagonals | Right angles where the room is not square; furniture does not fit | Measure the diagonals: one in a four-corner room, n − 3 in a room with n corners |
| Measuring the door leaf, not the opening | Doors too narrow | Measure the opening in the wall |
| Mixed units | A wall far too long or too short | Keep one unit on the sketch (Profile → Settings → Units) and check the unit on the keypad before you type |
Your sketch is ready? Open Home Planner, draw the room and type in your numbers. A plan with real sizes tells you whether the furniture fits before you buy it.
Trademark notice. Home Planner is not affiliated with, endorsed or sponsored by Apple Inc., Google LLC, Microsoft Corporation or Bluetooth SIG, Inc.; their names and marks belong to their owners. The Bluetooth® word mark and logos are registered trademarks owned by Bluetooth SIG, Inc. iPhone, iPad and Mac are trademarks of Apple Inc., registered in the U.S. and other countries. Android is a trademark of Google LLC. Other trademarks are the property of their respective owners.
Try it on your own project
Free app for iPhone, iPad, Mac, Android and Windows.