How to Make a Mood Board for Interior Design with AI

How to make a mood board for interior design from your project: the real furniture, decor and palette of a room, exported as a realistic AI image for your client.
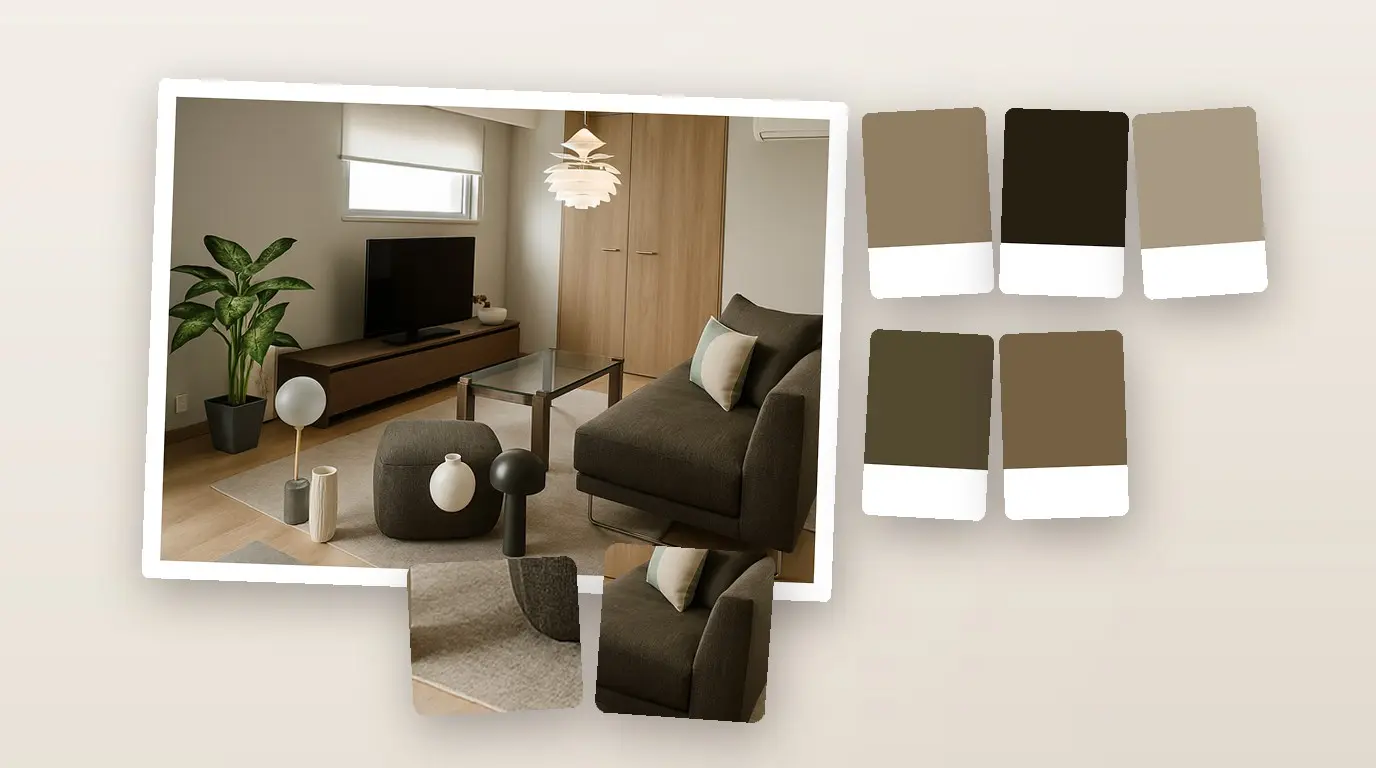
Your client signed off on the plan and now asks how the room will feel. A board of stock photos shows pieces nobody can order. This guide shows how to make a mood board for interior design from the project itself: Home Planner collects the furniture, decor and materials of a room into one collage with a 5-color palette, and every picture is a product you placed.
One button then turns the board into a polished, realistic image for the client and opens the share window. Opening the board, choosing a room or floor and editing it are free on iPhone, iPad, Android, Mac and Windows. Export for client and the mood board page in the client PDF come with PRO+.
How it works
The board comes from the project, so it changes when your plan changes.
- Furnish the room with the products you propose: furniture, decor, colors and materials.
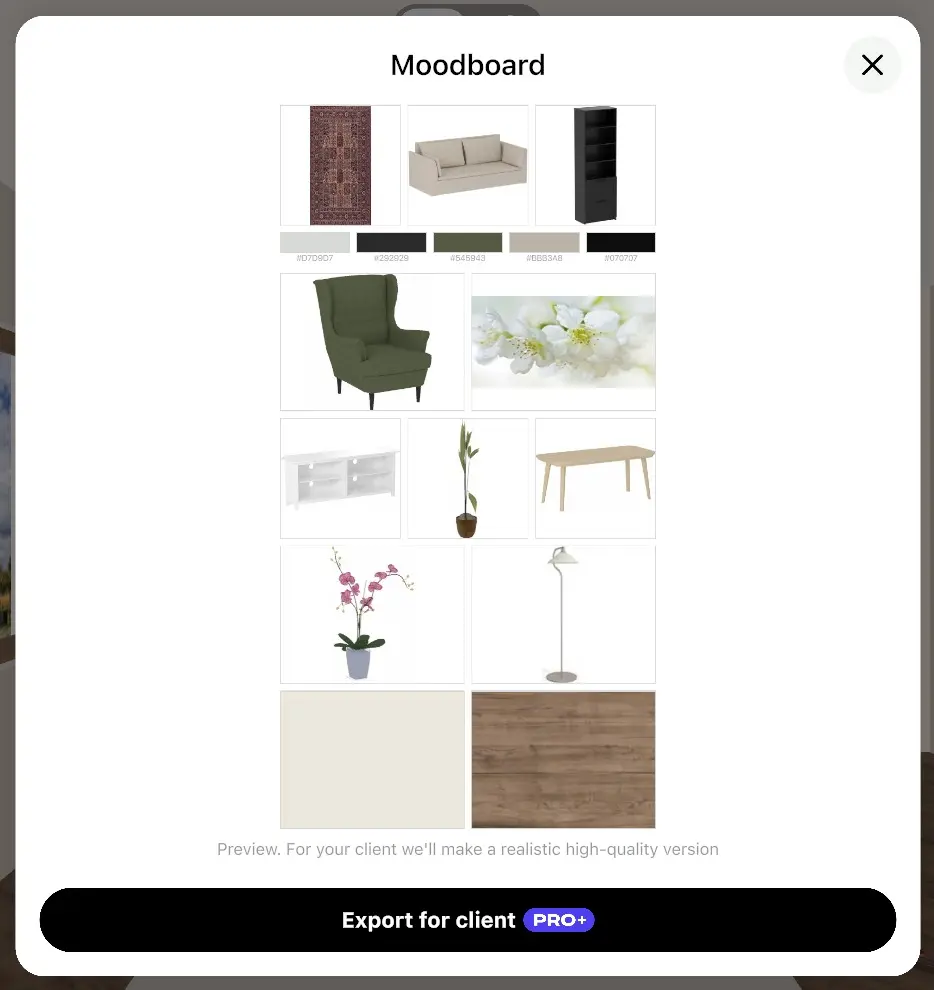
- Open Moodboard from the share menu. Home Planner lays out the products of the room in a collage with a 5-color palette. Remove what does not belong.
- Select Export for client. Home Planner makes a realistic version of the board, saves it to AI Photos and opens the share window. You can also put the board into the client PDF.
Before you start
| You need | Why |
|---|---|
| A project with a room that has at least 3 different catalog items | The board is made from the furniture and decor of the room. Copies of the same model count once, and doors, windows and wall materials do not count. A room with fewer items shows "Your moodboard isn't ready yet". |
| Home Planner on iPhone, iPad, Android, Mac or Windows | The Moodboard window and the collage are free on every device. |
| Home Planner PRO+ or PRO++ | Needed to send the board to a client: Export for client (the realistic version) and the mood board page in the client PDF. |
| An internet connection | The realistic version is made on Home Planner servers. Without a connection, the app shares the collage instead. |
Step 1: Agree on the style with AI Redesign (optional)
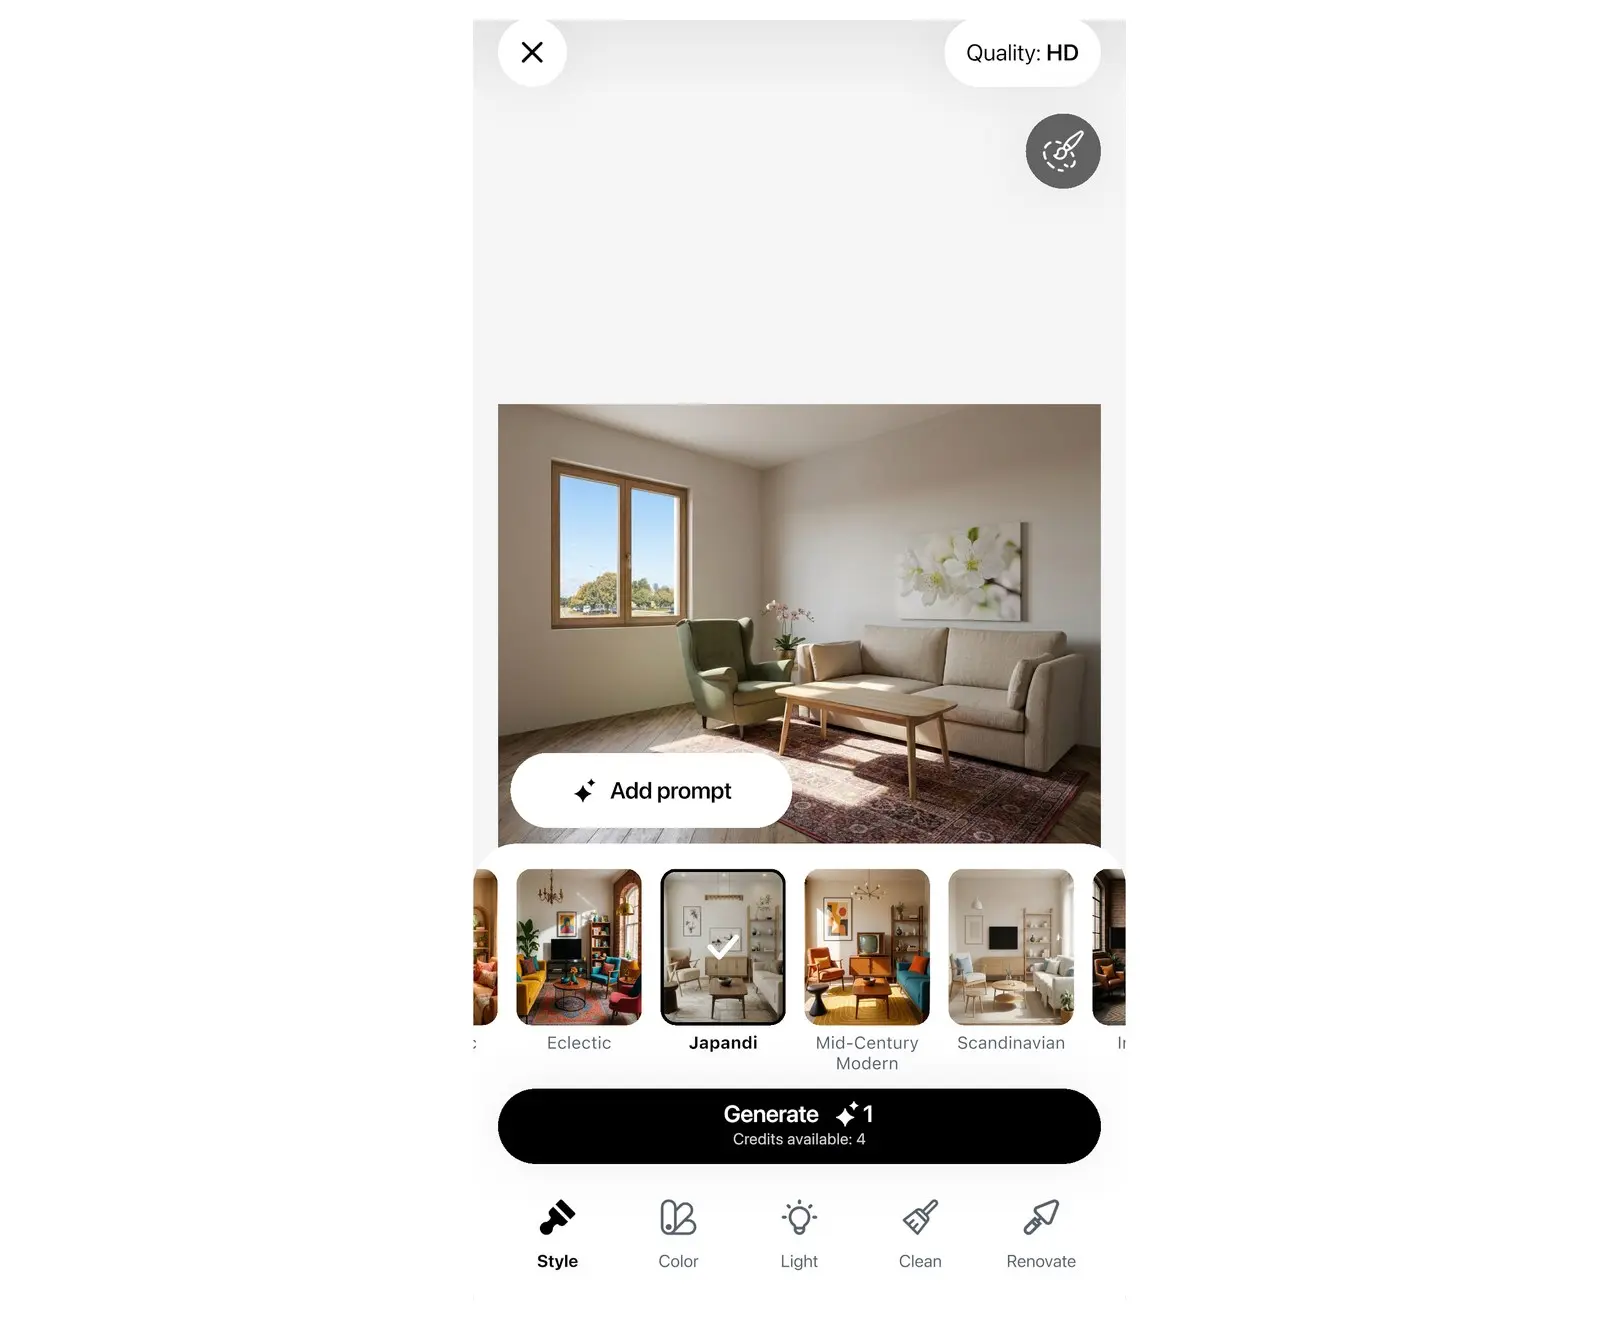
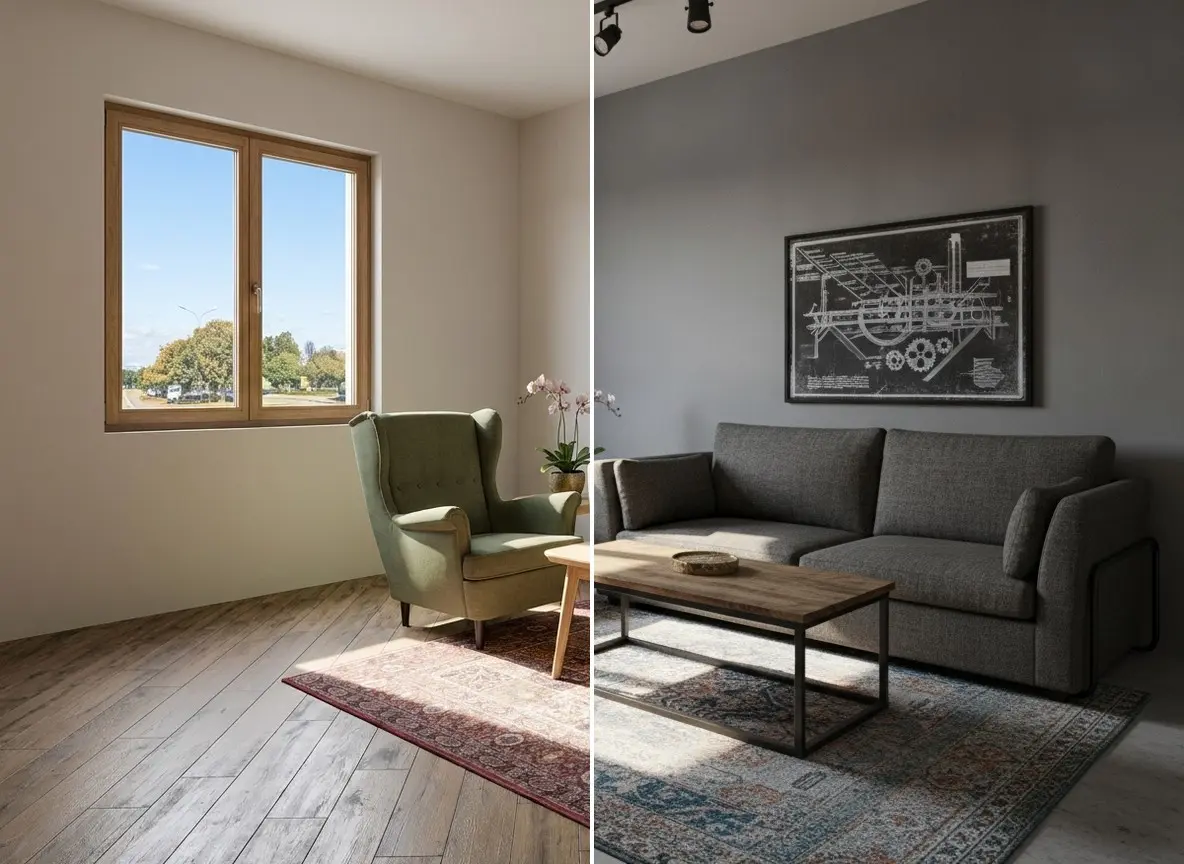
If the client has not chosen a style yet, show them their own room in two or three styles before you pick products. Home Planner AI Redesign restyles a photo of the room in 40+ interior styles. Full guide: how to redesign your room with AI from a photo.
- Open AI Redesign: on a phone, select Create, then Start on the AI Redesign card, then New design; on a tablet, Mac or Windows, select AI Redesign in the side menu, then Upload Photo.
- Choose a photo of the room. In Adjust photo, crop it if needed and select Continue.
- Select Style, choose a style tile, for example Scandinavian or Japandi, and select Generate. Every Generate uses one credit; Credits available shows how many you have.
- Generate 2–3 styles on the same photo and let the client choose. The chosen variant guides the colors and materials in the next step.
Step 2: Furnish the room with the products you propose
The board shows only what is in the room. Place the pieces you will put in the proposal, not placeholders.
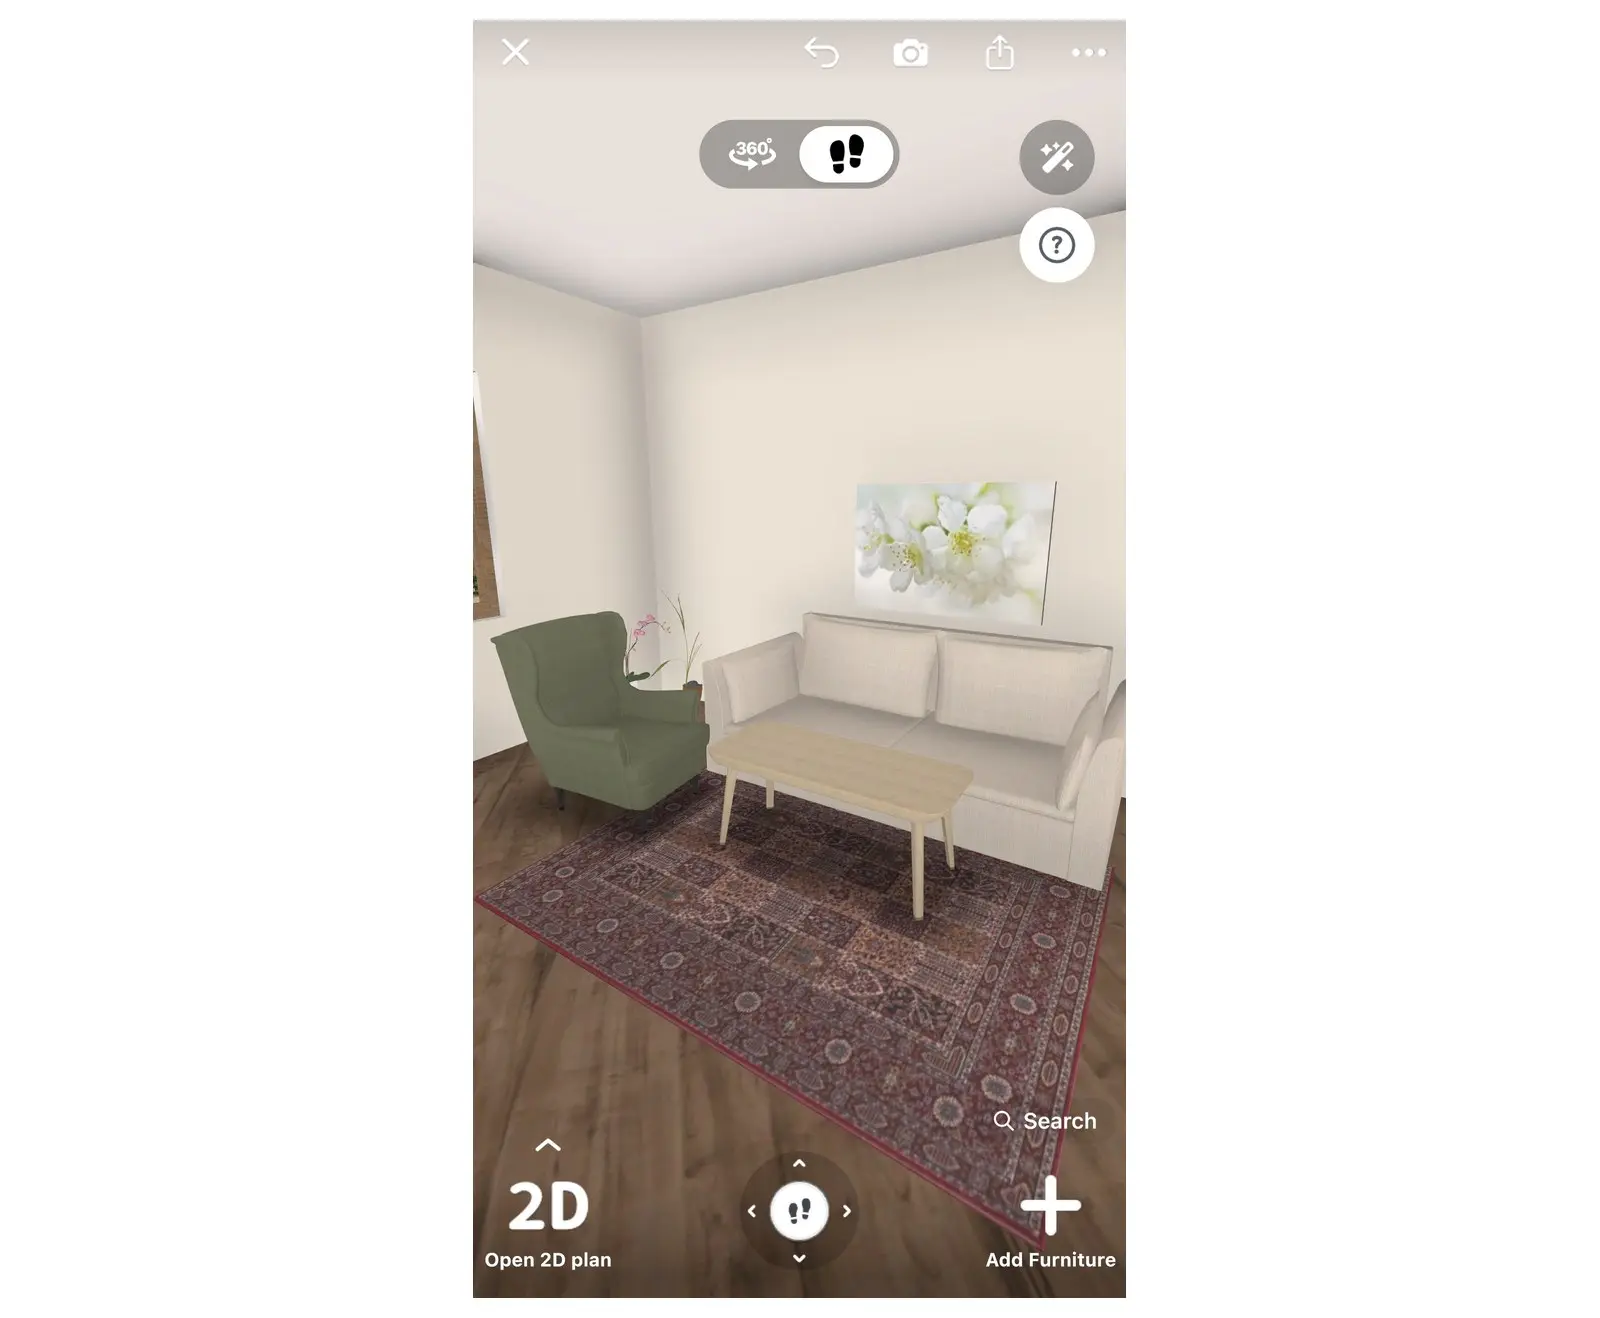
- Open the project, or start one: select Create, then Start on the 3D Design card, and draw the room or start from a floor plan.
- Select Add Furniture and add furniture and decor from the catalog: brand products keep their real size and price. Add at least 3 items.
- Select a wall or the floor. In the small toolbar above it, select the first button, the color swatch, and choose a color or material. The board picks up the main materials of the room.
- Check the room in 3D. If a piece does not fit, change it now: the board changes with it.
Step 3: Open the mood board
Home Planner builds the board for you: no collage tool, no screenshots, no cutting out product photos.
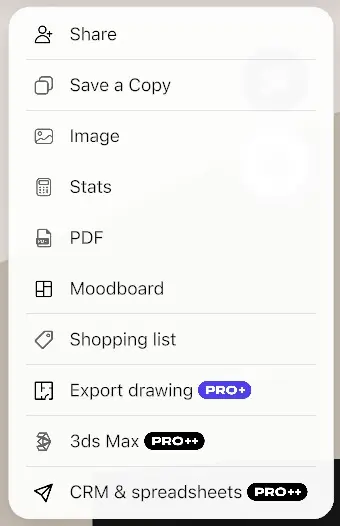
- In the project, select the share icon in the toolbar.
- Select Moodboard. It is right after PDF in the menu.
- When two or more rooms of the project have at least 3 items, choose at the top what the board shows: All, a floor (when those rooms are on different floors) or one room. The window opens on the room you are editing.
The Moodboard window shows a collage of 3 to 12 cells with the furniture, decor and up to 3 materials of the room, and a palette of 5 colors with their HEX codes. Each model gets one cell: two identical chairs share a cell, and the same chair in two colors gets two. The line under the board says it is a preview: the client gets a realistic, high-quality version.
Step 4: Edit the board
Remove anything that distracts from the idea, such as a small lamp or a plant. The next item of the room takes its place.
- Select an item in the collage. A frame with a close button (✕) appears on it.
- Select ✕. Home Planner rebuilds the collage without that item.
- To bring back everything you removed, select Restore all under the board.
Your changes are saved in the project, separately for each room or floor. If you remove every item, the window shows All items removed and Restore all.
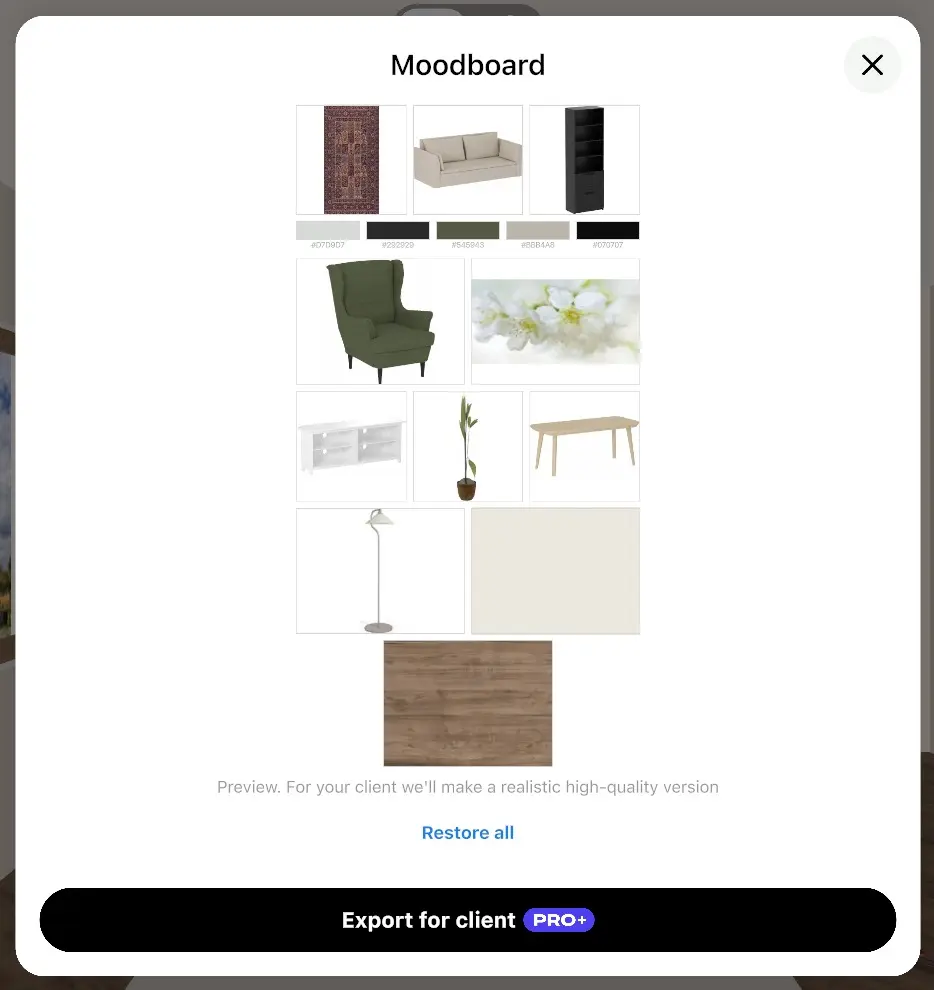
Step 5: Export the mood board for your client
With PRO+, Home Planner turns the collage into a polished version of the same board: the same products in the same layout, as clean cut-outs with soft shadows on a light background, with the color palette and its HEX codes. It stays a board, not a photo of the room. It is an AI image, so check small details, such as a handle or a fabric pattern, before you send it, and tell your client it is an AI-generated image.
- Select Export for client. Without PRO+, the plan comparison opens first; after the purchase the export starts by itself.
- Wait while the button shows Making it realistic…. When the image is ready, it replaces the collage in the window.
- The share window opens with the image, named after the room or floor you chose, for example Moodboard — Living room. Send it by email or a messenger, or save it.
Home Planner also keeps the image with your AI Photos: open My designs, then Gallery. Export the same board again and you get the ready image at once, with no new AI generation. Change the board and the next export makes a new version.
If the daily AI limit is used up, or there is no connection, Home Planner shares the collage instead and says so, for example "No connection — we shared the preview".
Step 6: Add the mood board to the client PDF
To give the client the board together with the plan, the shopping list and your estimate, put it into the client PDF.
- Select the share icon, then PDF. The Export PDF window opens.
- In the PDF for your client block, turn on Moodboard. You can also turn on Logo in the header and Client estimate there. The block needs PRO+: without it, selecting a row opens the plan offer.
- Select Export. The PDF gets a mood board page for each room, with the realistic version of its board.
While the realistic versions are being made, the window shows Skip AI moodboard: select it to get the PDF at once with the collages. Without a connection, or when the daily AI limit is used up, the PDF gets the collage, and Home Planner says so. Full guide to the client PDF: how to make a floor plan PDF with measurements.
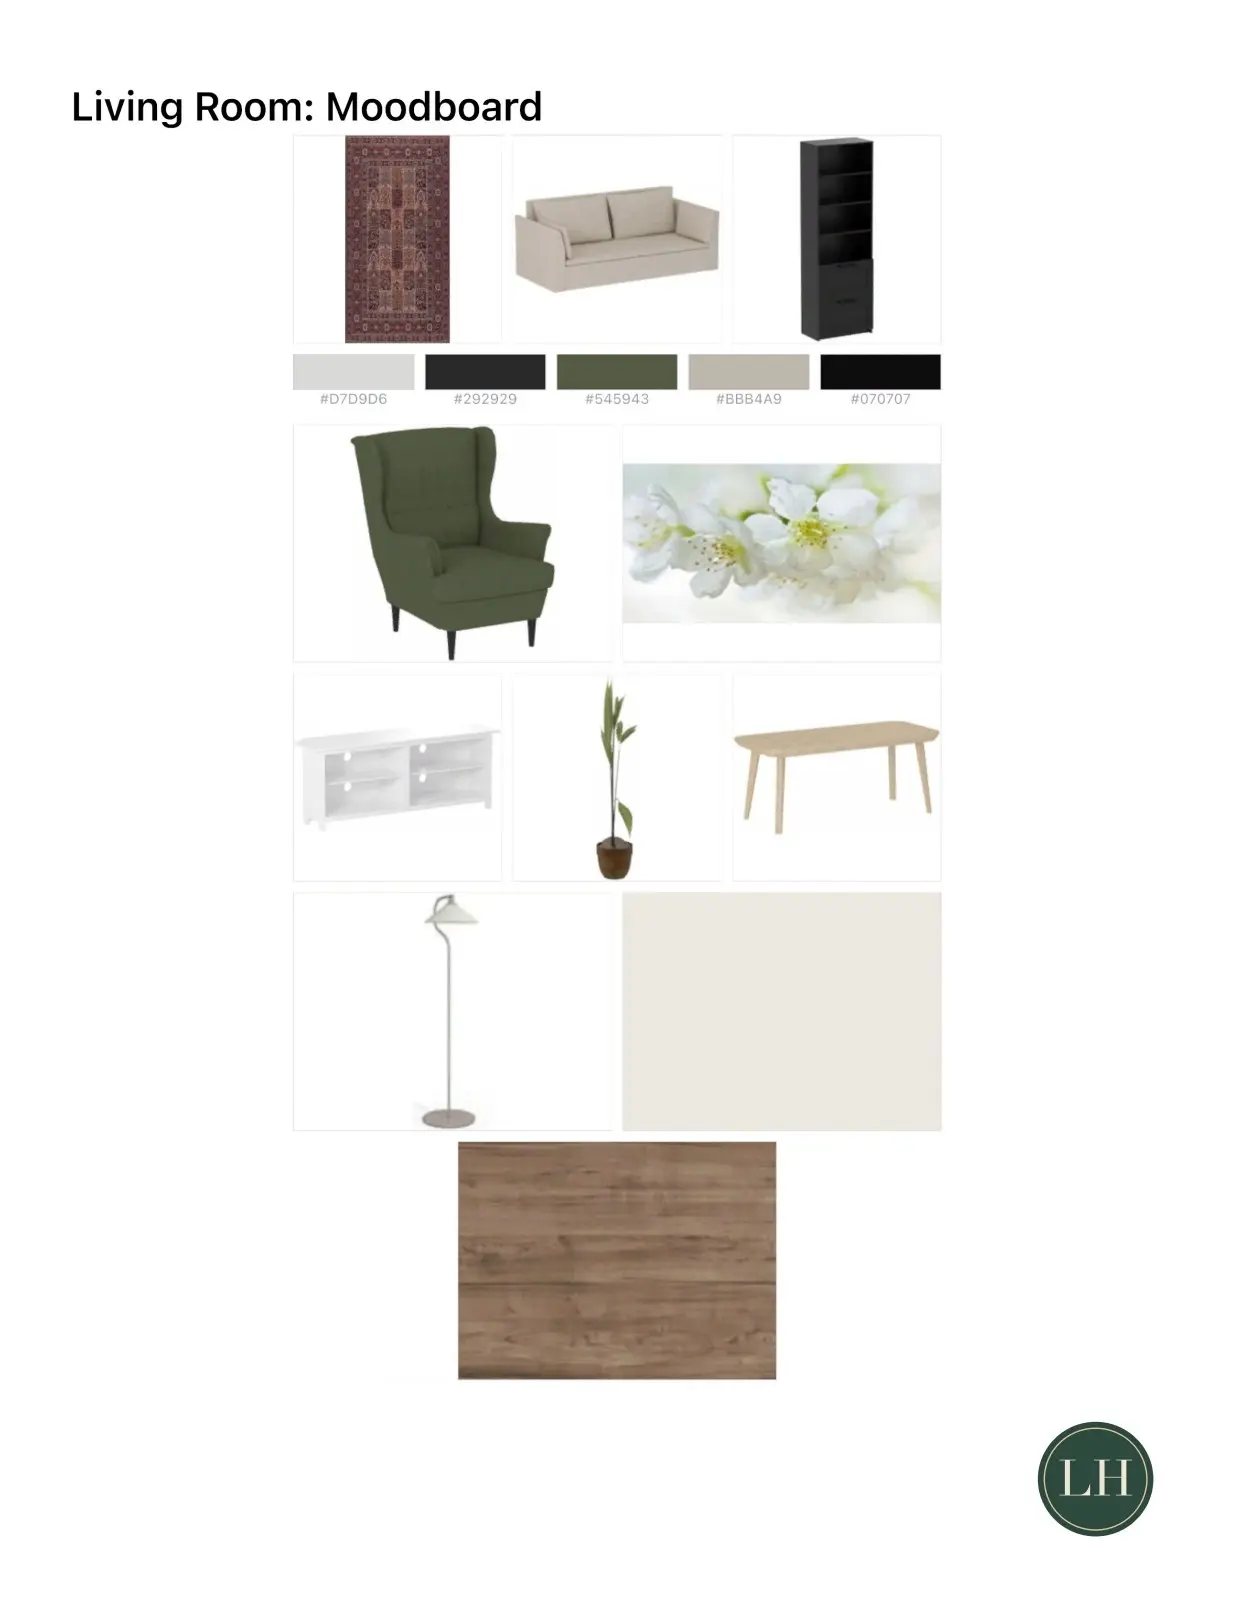
How do you present a mood board to a client?
Show one board per room, next to the plan and the estimate, so the client sees the look, the layout and the cost together.
- Make one board per room. Use All or a floor only for a quick overview of the whole project.
- Remove small items that do not carry the style, so the key pieces get the large cells.
- The palette always has 5 colors. If they look random, change one wall or floor material and open the board again.
- Show the room itself next to the board: an AI Photo or a 3D render of the planned room shows how the pieces work together.
- Working on the project with a co-author? Your board and its removed items stay as you left them when the co-author edits the plan.
Trademark notice. Home Planner is not affiliated with, endorsed or sponsored by Apple Inc., Google LLC or Microsoft Corporation; their names and marks belong to their owners. iPhone, iPad and Mac are trademarks of Apple Inc., registered in the U.S. and other countries. Android is a trademark of Google LLC. Other trademarks are the property of their respective owners.
Try it on your own project
Free app for iPhone, iPad, Mac, Android and Windows.