How to Make a Floor Plan PDF with Measurements & Elevations

Make a floor plan PDF with measurements in Home Planner: colored plans, room statistics, wall elevations for kitchens and bathrooms, and a shopping list.
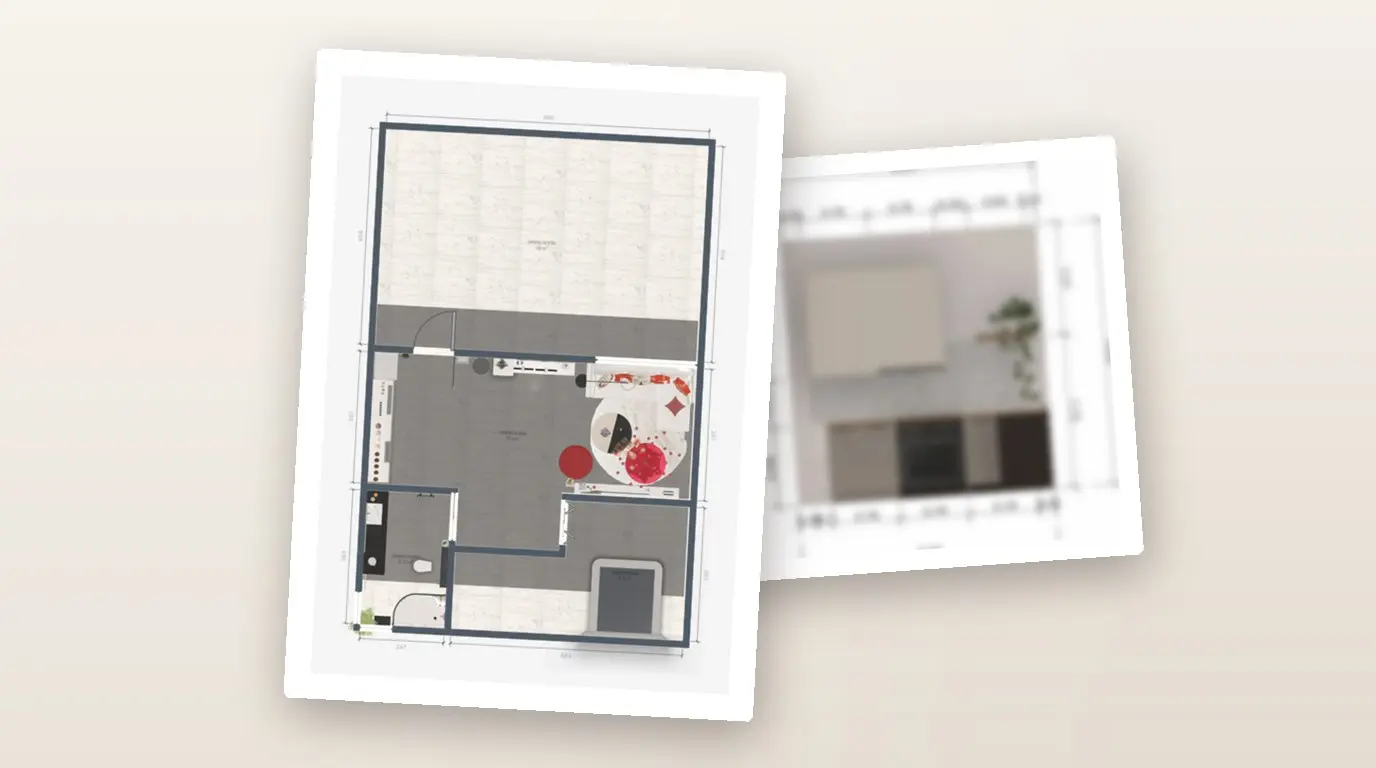
A builder asks for the plan with sizes. A kitchen fitter wants a drawing of each wall, and your partner wants to know what the furniture costs. One floor plan PDF with measurements from Home Planner answers all three. You choose the pages in one window, and the app builds the file from your project. The report holds a colored floor plan of every level or room, a measurements table, wall elevations for kitchens and bathrooms, and a shopping list of the furniture you placed.
Creating the PDF report is free on iPhone, iPad, Android, Mac and Windows. The free PDF carries a small Home Planner watermark; PRO+ removes it.
Before you start
You need a Home Planner project with at least one room.
| You need | Why |
|---|---|
| The Home Planner app | On your phone, tablet or computer. |
| A project with rooms | The report is built room by room from your floor plan. Draw the rooms, import a plan or measure them first. |
| Room types (for wall elevations) | To set a room type, select the room in the 2D plan, then the three-dots button → Information → Room type. |
| Furniture with prices (optional) | The shopping list and its total come from the items you placed in the rooms. |
| Home Planner PRO, PRO+ or PRO++ (optional) | PRO adds the Utility plan sheets page. PRO+ or PRO++ adds the PDF for your client block and removes the watermark. |
Make a floor plan PDF in Home Planner
You create the floor plan PDF from the share menu of the project editor. Home Planner shows the same steps on a phone, a tablet and a computer. Names in bold are the English names; the app shows them in your app language.
Open the Export PDF window
- Open your project in Home Planner.
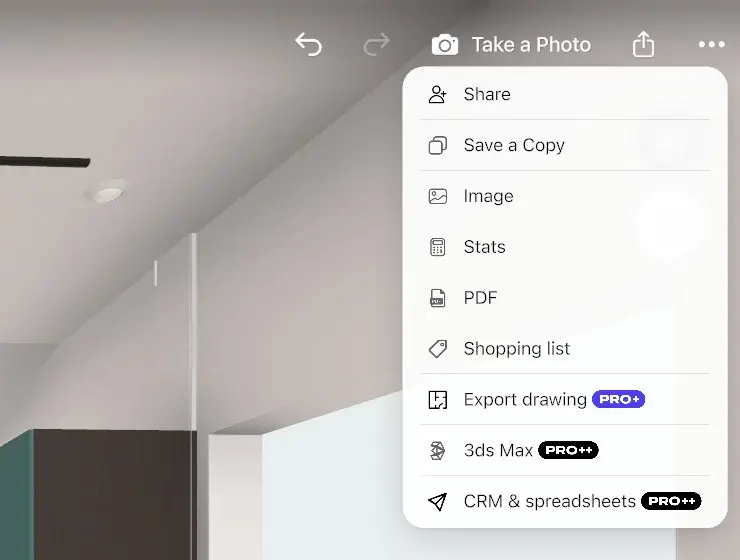
- Select the share icon (a square with an arrow pointing up) at the top right of the editor; on a phone held sideways it sits on the right edge. The export menu opens.
- Select PDF. The Export PDF window opens. No share icon? Leave Edit Walls or the photo mode with Done at the top left.
If you see Love how it looks? with Unlock All PRO items, your project has PRO furniture, doors or windows and you have no subscription. Choose one:
- Upgrade & Unlock PRO to keep them.
- Delete All & Continue to remove them and go on to Export PDF. The app asks you to confirm.
- Close the window to go back to the editor.
Choose what goes into the PDF
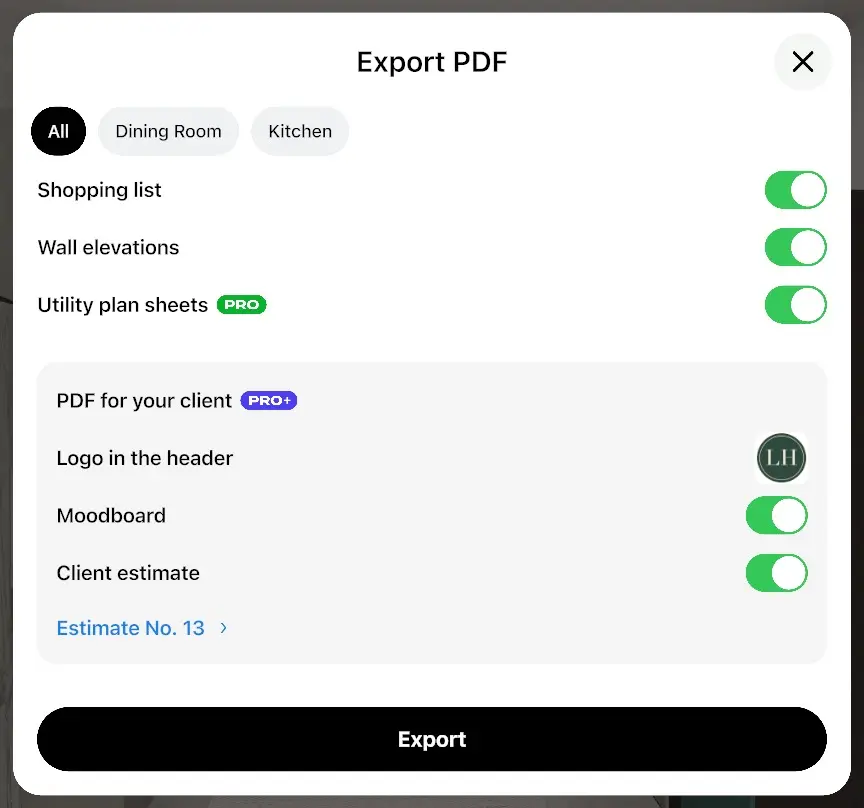
The Export PDF window shows a row of room tabs (when the project has more than one room), the pages of the report, and the PDF for your client block.
- In the tabs at the top, select All for the whole project, a floor tab for one floor, or a room tab for one room. The window opens on the room or floor you have open in the editor.
- Turn the pages on or off (see the table below). Home Planner remembers your choice for the project, and a new project starts with your last choice.
- Select Export.
With two or more rooms, the PDF is grouped by room: each room gets its own section with its plan, measurements, elevations and shopping list.
| Row in Export PDF | What it adds |
|---|---|
| Shopping list | The furniture and decor in the rooms, with pictures, prices and the total price. |
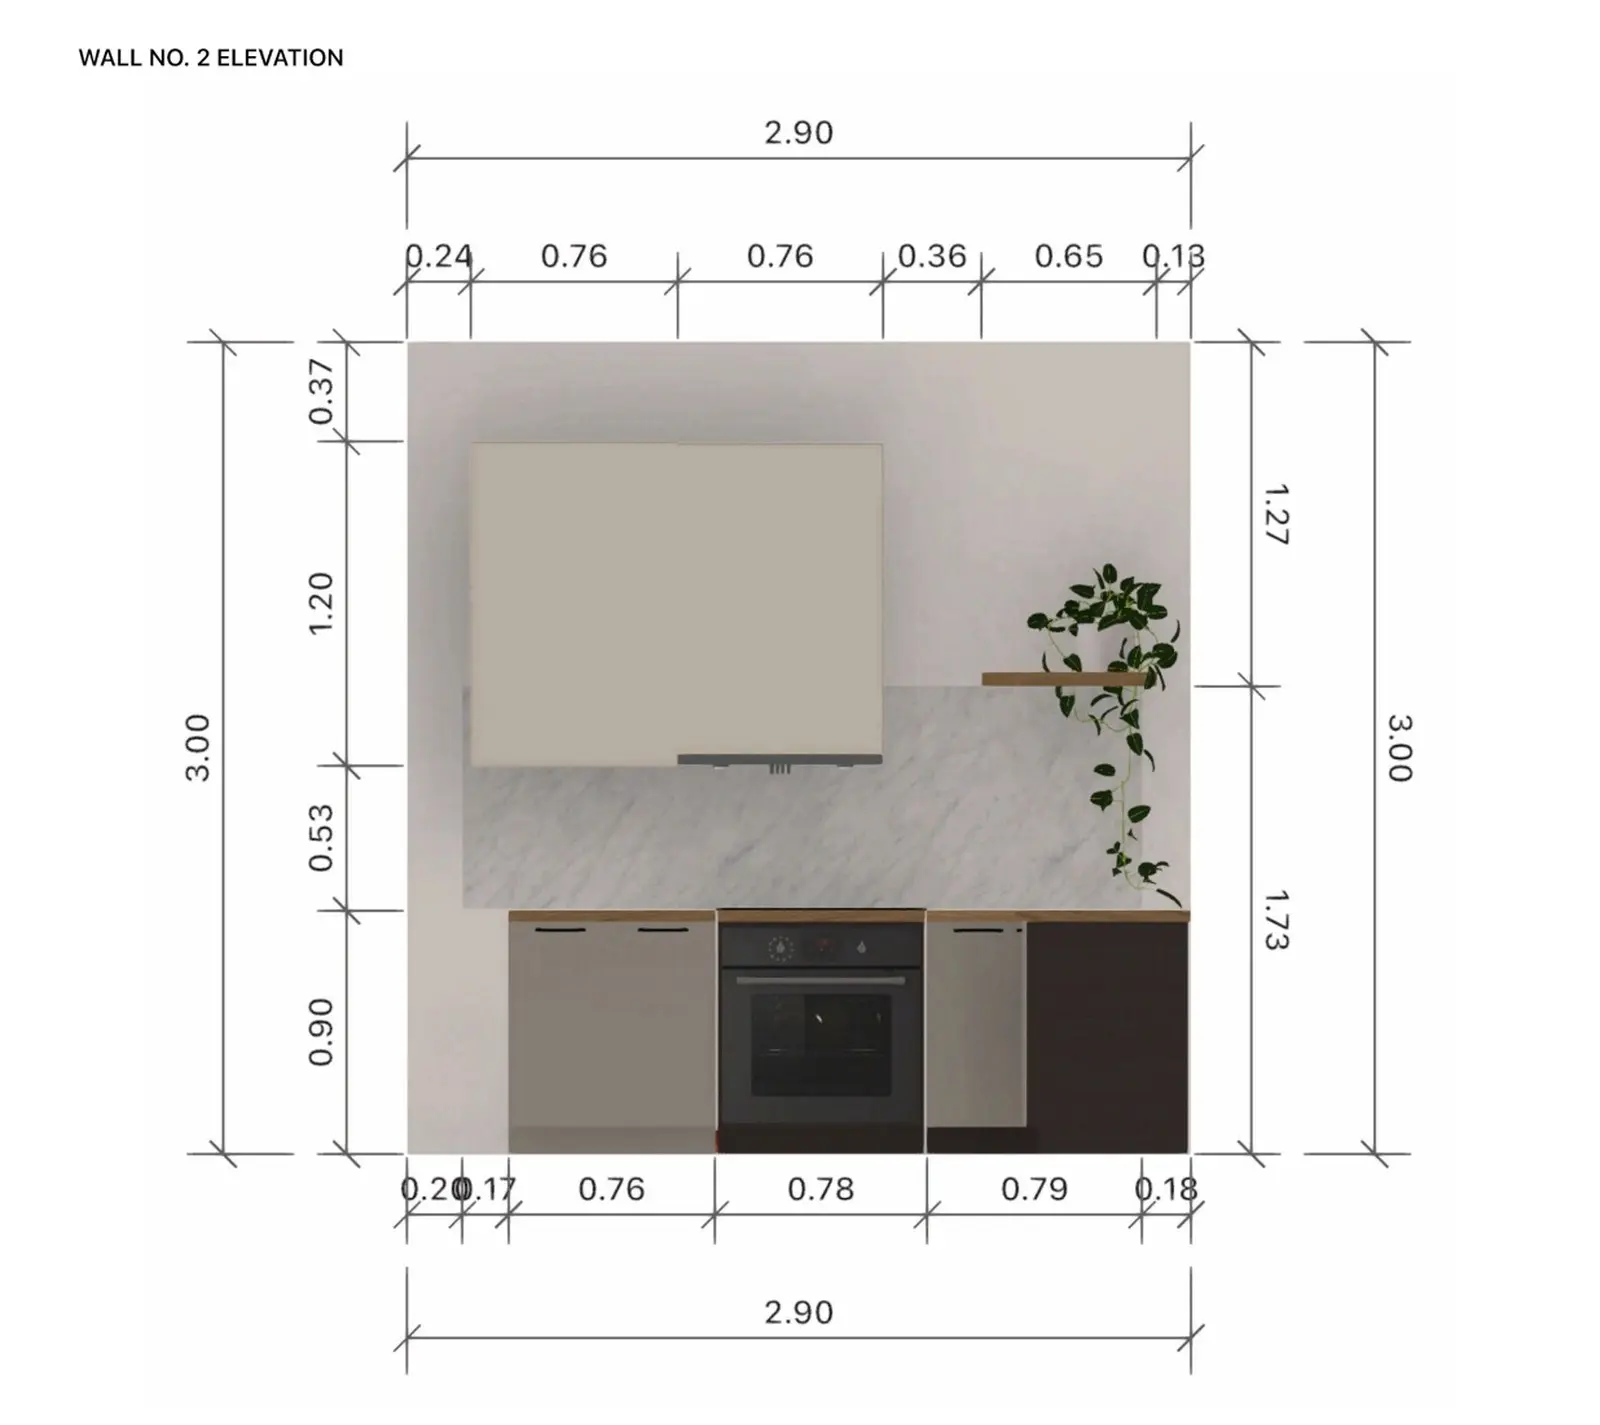
| Wall elevations | A face-on drawing of each wall with its furniture and size markers. Shows when the project has a Kitchen or Bathroom room, or only one room. |
| Utility plan sheets (PRO) | A black-and-white plan with dimensions as the first sheet. Without PRO, the row opens the subscription offer; you can create the report without it. |
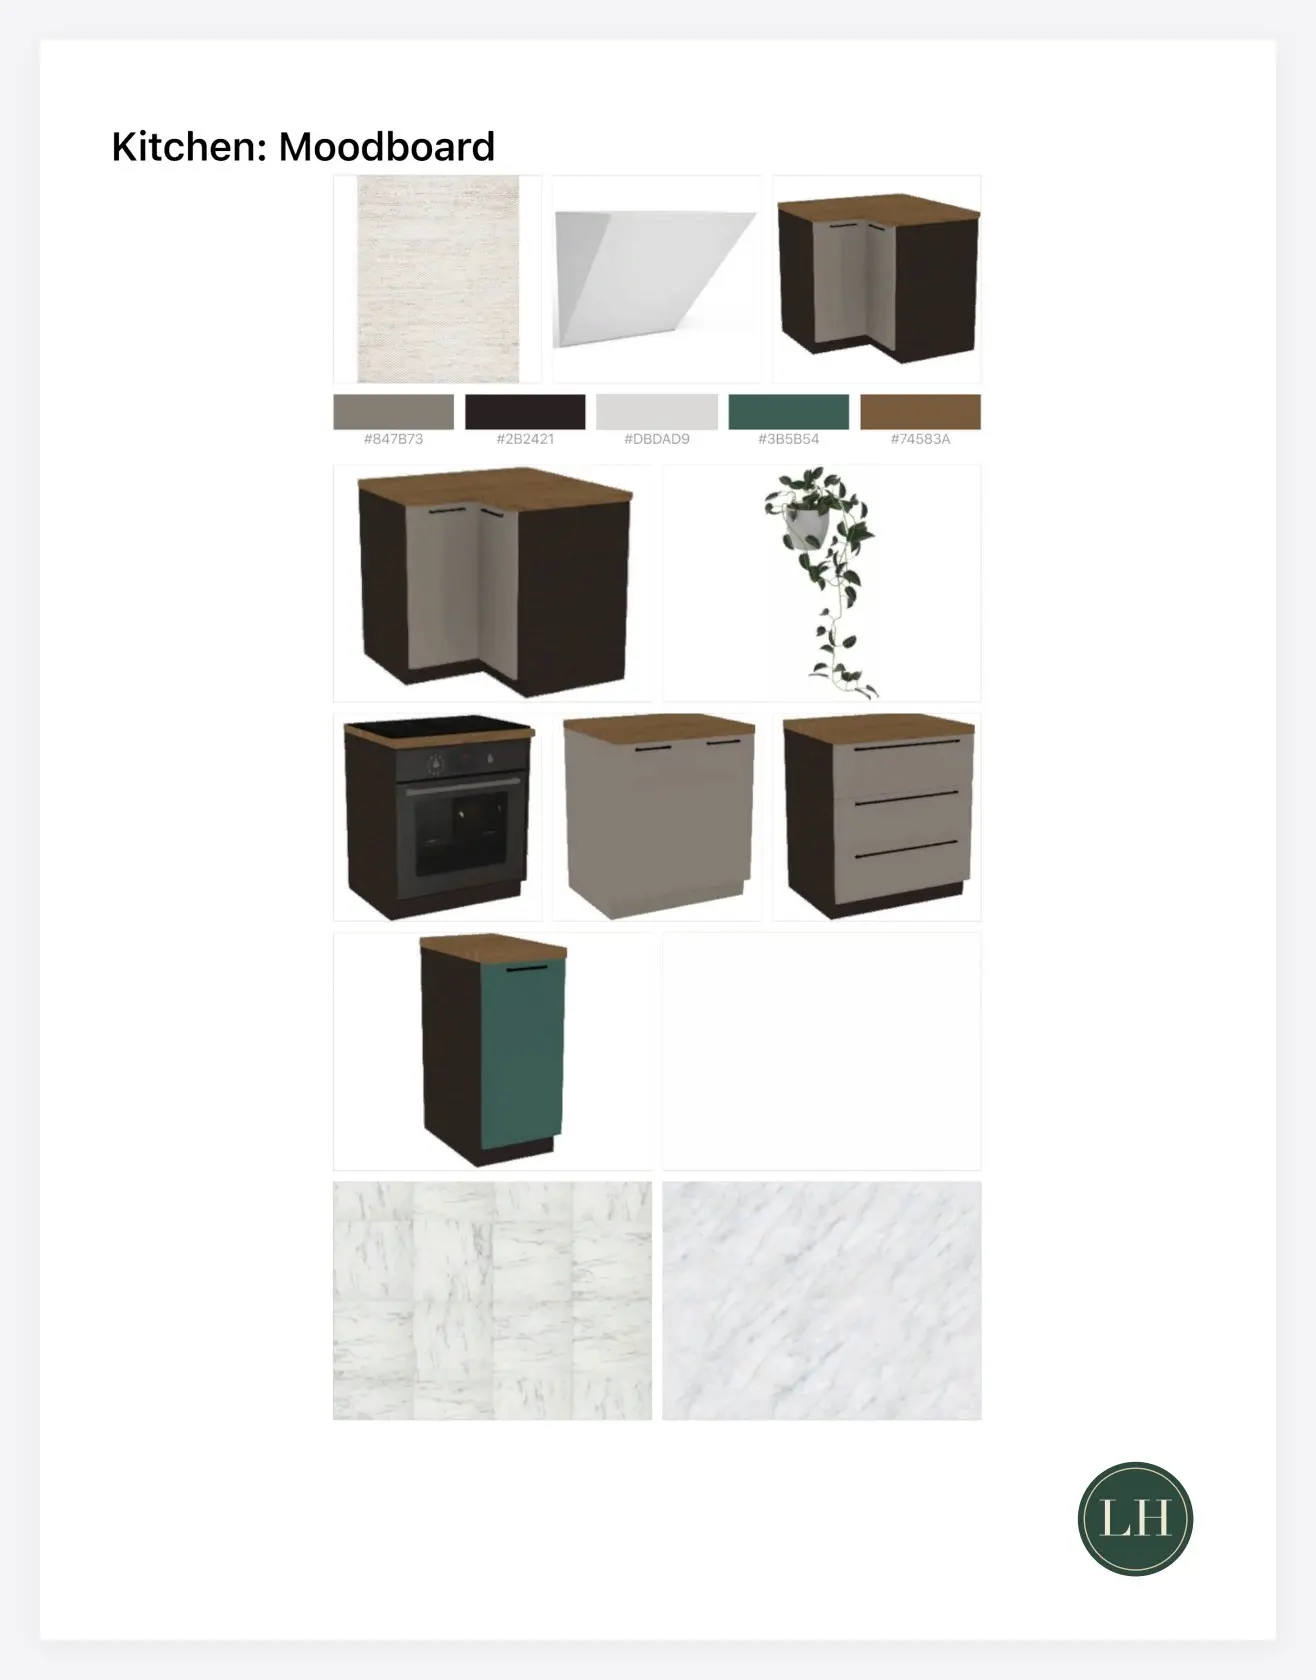
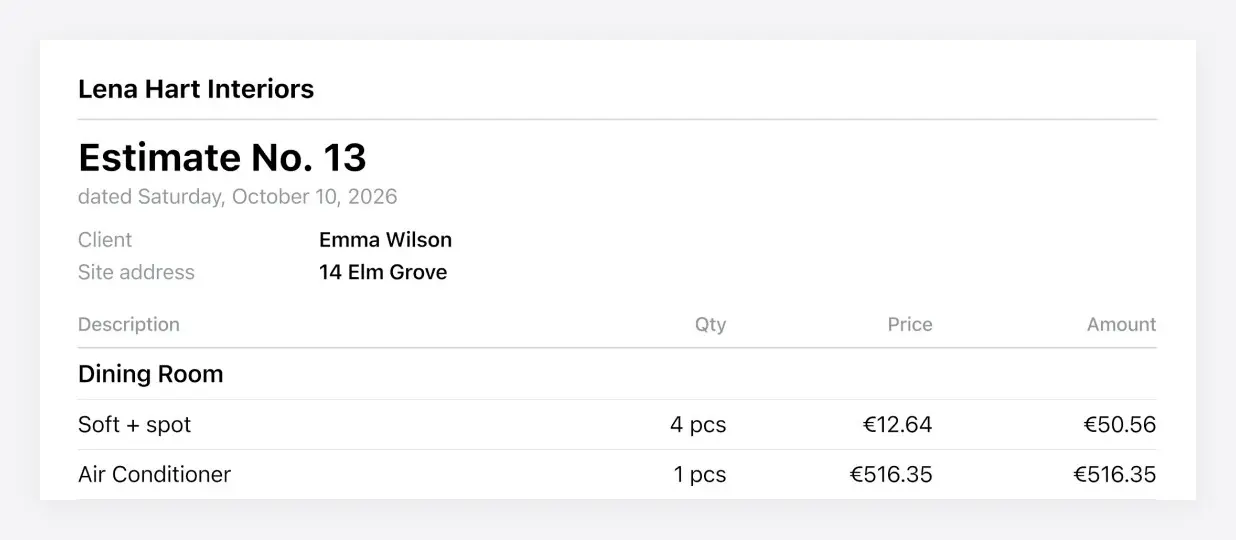
| PDF for your client (PRO+) | Your logo in the header, a mood board of each room and your client estimate. See "For designers: a PDF for your client (PRO+)". |
Without PRO+, any row in PDF for your client opens the PRO+ offer; after the purchase the row is on.
Save or share the PDF
- Wait while Home Planner shows Exporting to PDF with the current step. A large project with many rooms takes longer.
- In the window that opens, save the file or send it. On Android, the share sheet of your phone opens: choose a messaging app, an email app or a cloud app. On iPhone and iPad, choose where to save the file; to send it, open it in Files and select Share. On Mac and Windows you choose a folder.
The file name is the project, floor or room name plus "Full report", for example "My Flat - Full report.pdf". Every export of the same project gets the same name, so rename each file before you send several.
What the floor plan PDF contains
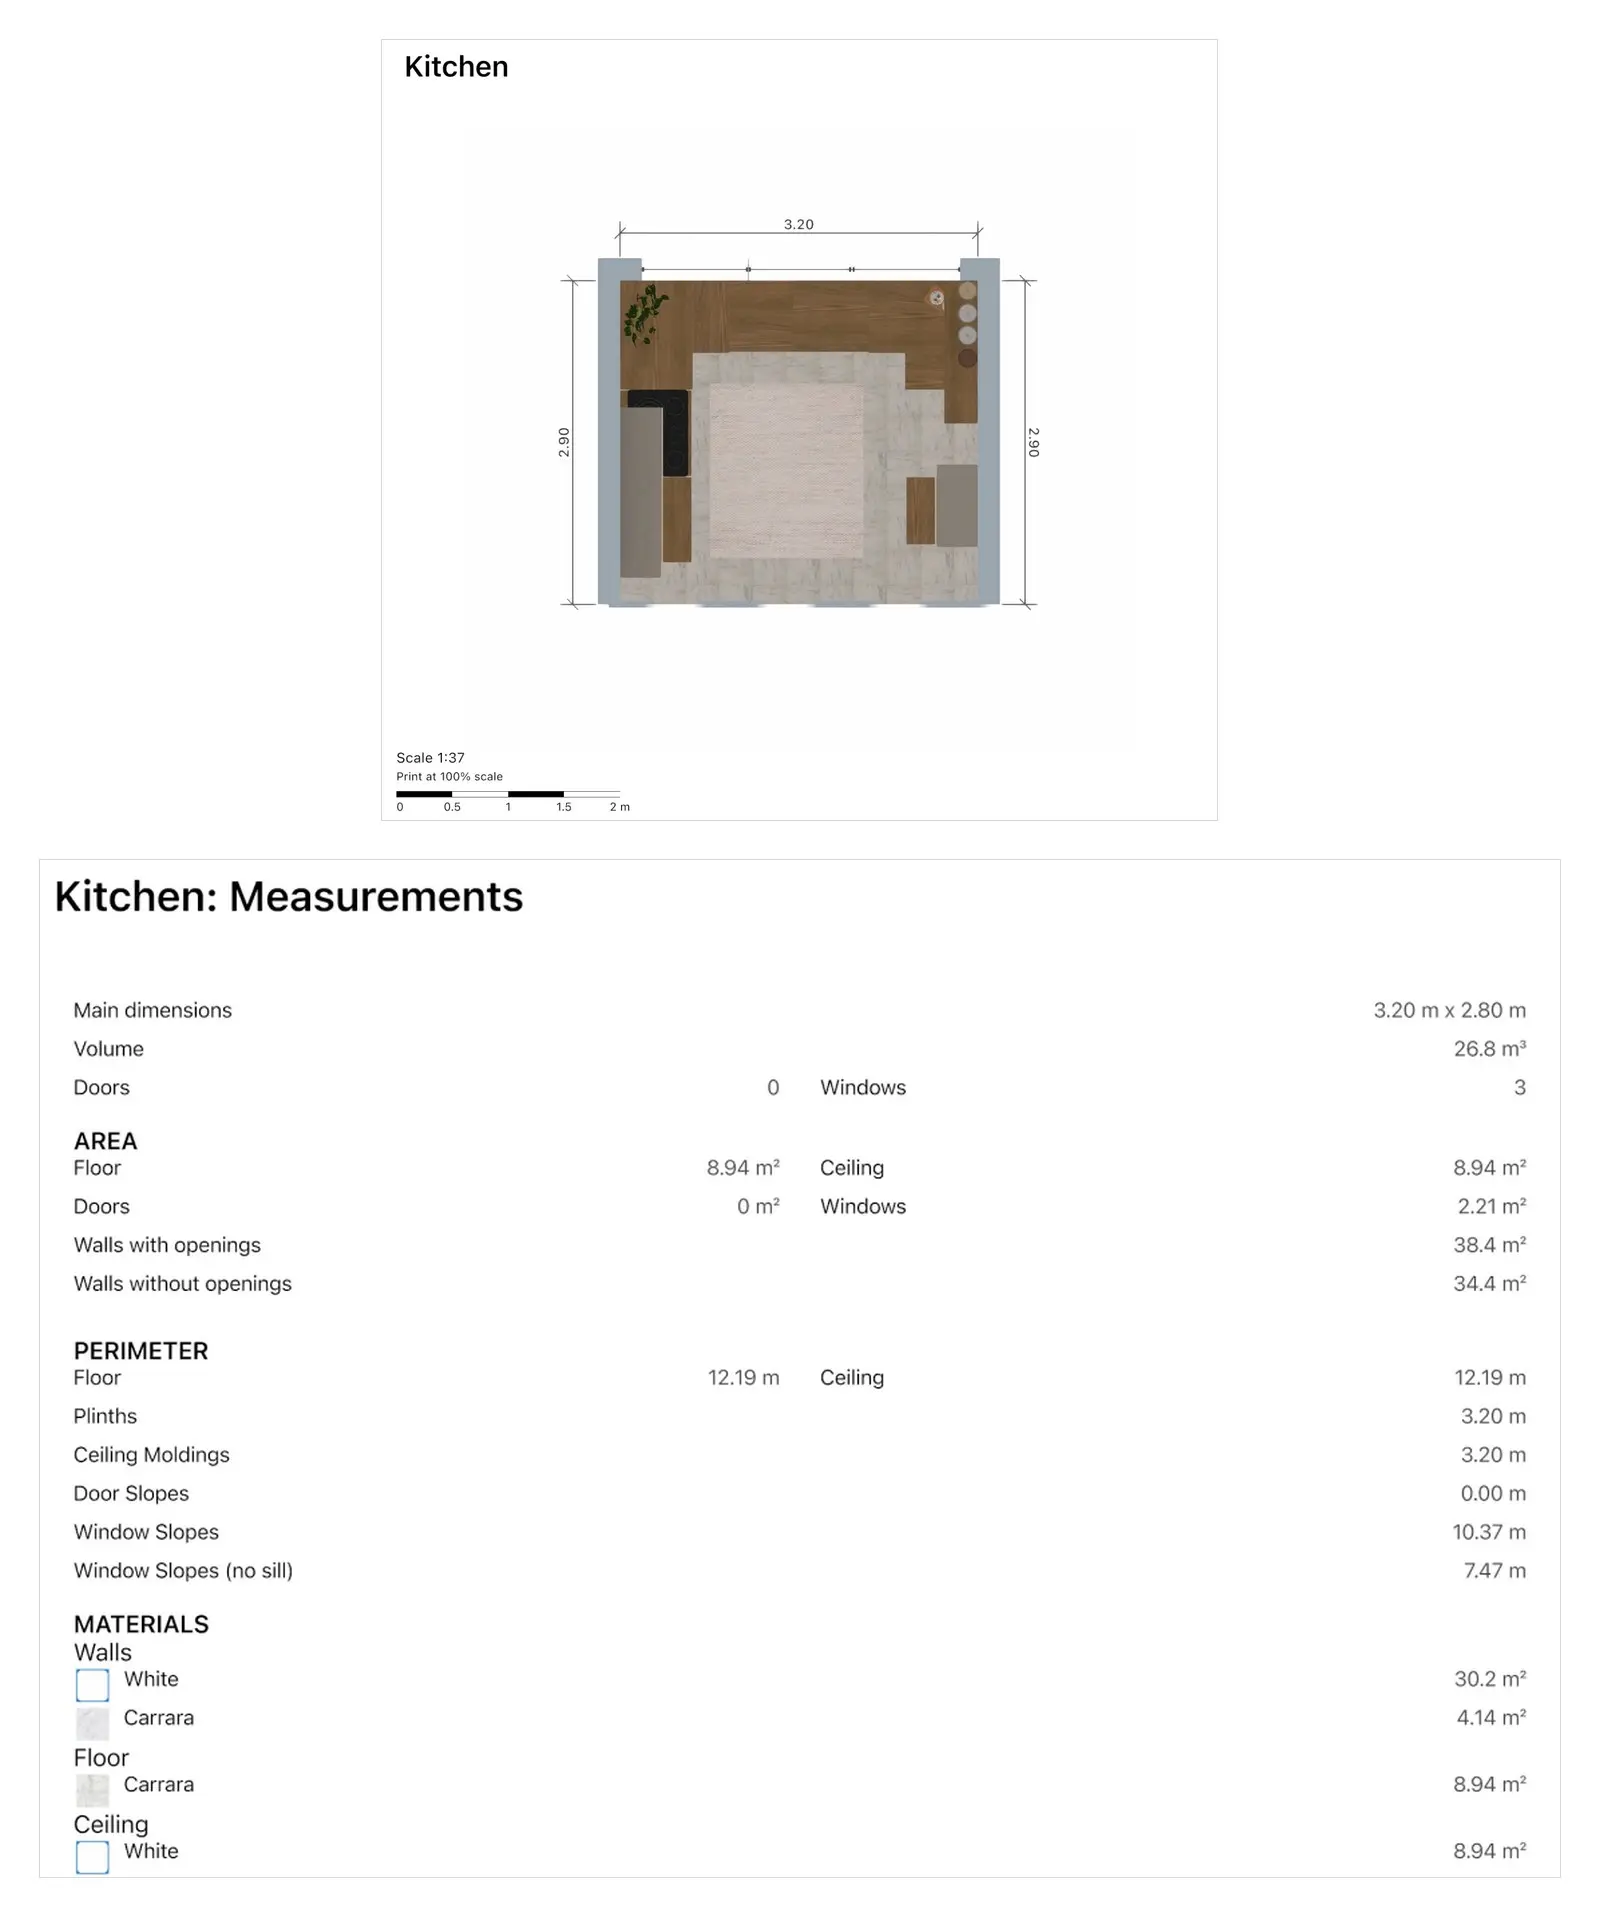
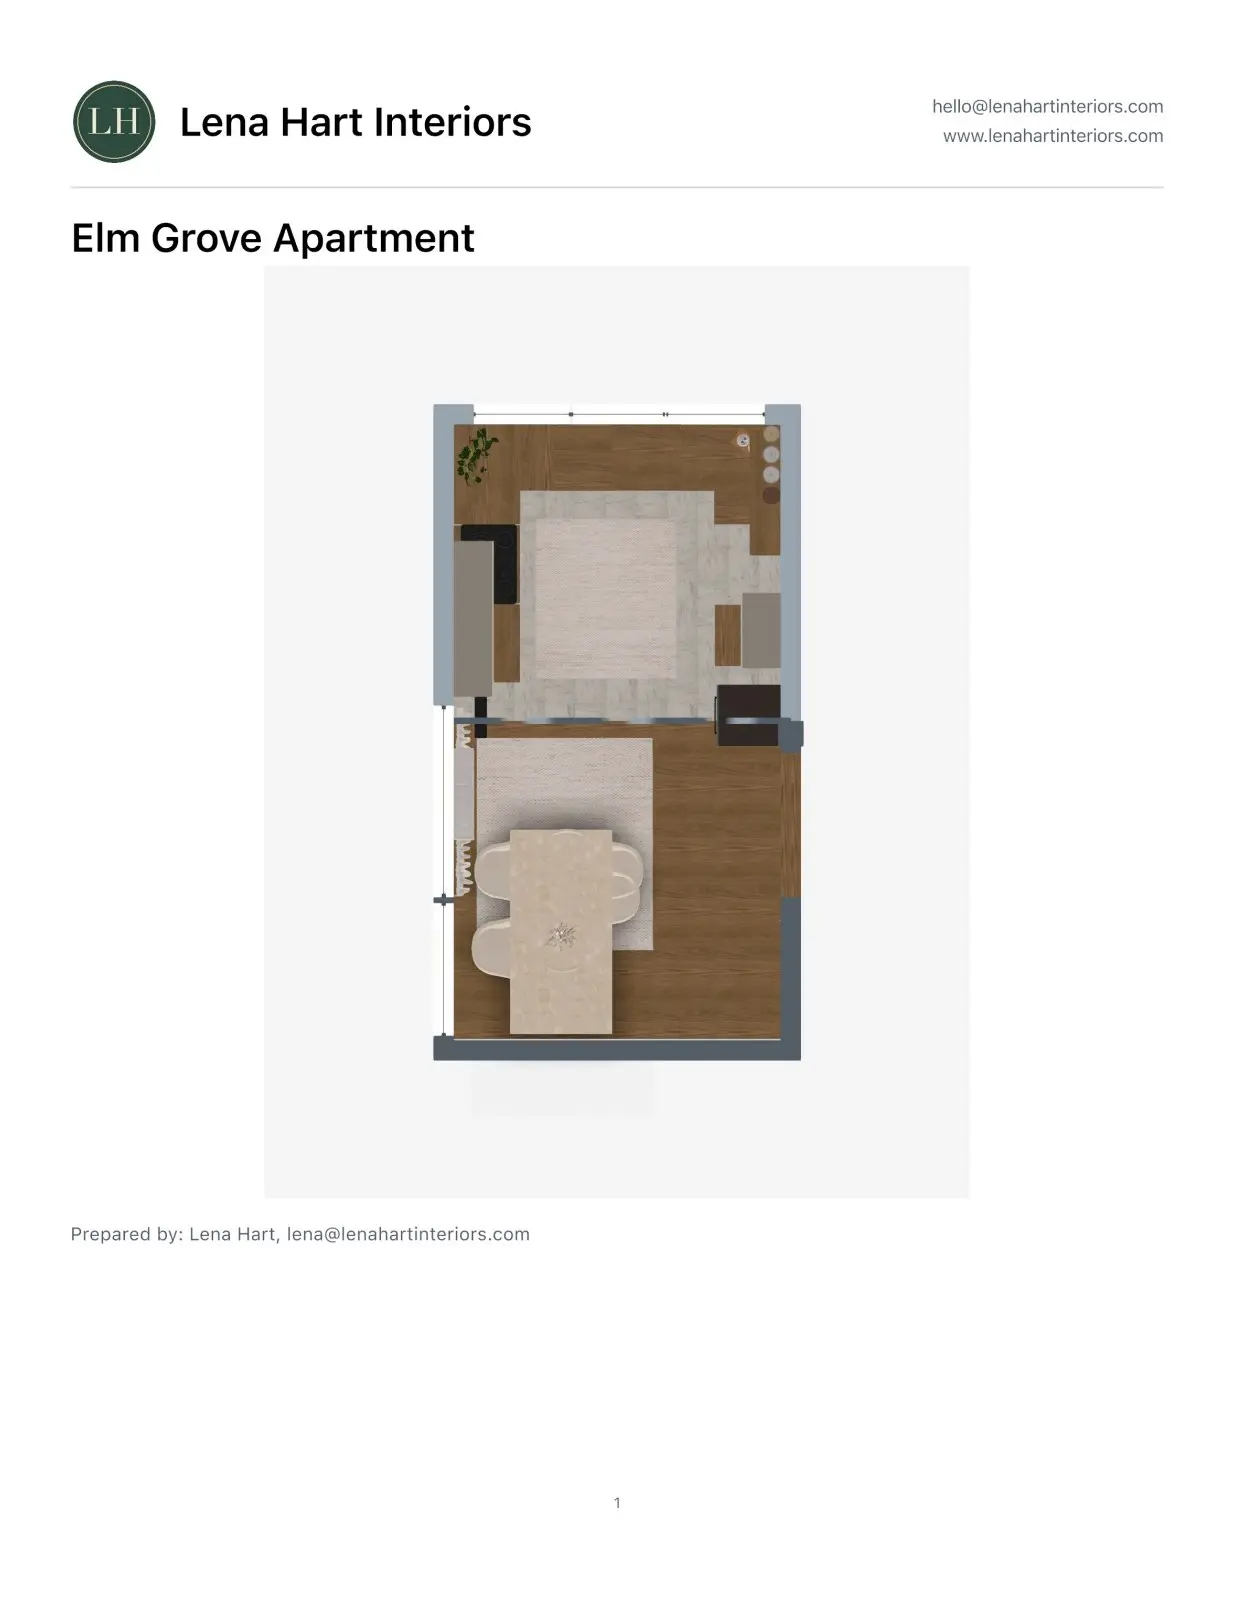
Export a kitchen with every option on, and you get the colored Kitchen plan with wall sizes, its Measurements table, a face-on drawing of each kitchen wall and the shopping list with prices. Two sections are in every report:
| Section | What you see |
|---|---|
| Colored floor plan | A plan of each floor that has several rooms, and a plan of each room, in color with furniture. The plan is labelled with its scale, for example Scale 1:50, with a scale bar and "Print at 100% scale". When Utility plan sheets is off, the wall sizes are printed on the room plans. |
| Measurements | Area, perimeter, volume, walls with and without openings, the number of doors and windows, and other room statistics. |
The Measurements section uses the units set in Home Planner (metric or imperial). Need a CAD file instead? Convert the plan to DWG or DXF. To price the whole renovation from the shopping list, see how to estimate renovation costs from a floor plan.
Tips for a clear floor plan PDF
A clear report comes from correct room names and types and a complete room layout in Home Planner.
- Give each room a name and a type. The report uses the names as section titles.
- Check the wall lengths in the 2D plan before you export. The PDF prints the sizes from your plan.
- Turn Shopping list off when the reader does not need your prices, for example a builder or a buyer of the flat. Keep it on to discuss the budget at home.
- To measure on paper, print at 100% scale and read the plan with its scale bar. The PDF is Letter size when your device region is the United States or Canada, and A4 everywhere else.
- The pages are images: to change the content, edit the project and create the PDF again.
For designers: a PDF for your client (PRO+)
Send a client one PDF with everything they need, under your own logo.
- Make the client estimate first: select the share icon, then Shopping list, then Client estimate.
- Select Client and enter the name or company and the site address.
- Select Markup on items and set your markup. The client sees only the final prices.
- Under Work, give a work row a price, or select Add work: enter a name, choose What to count (for example Floor area) and the unit price. The quantity comes from the plan.
- Select Estimate PDF. Home Planner saves the estimate under Saved estimates with a number; the report uses it.
- Open Export PDF (share icon, PDF).
- In PDF for your client, select Logo in the header and choose your logo image: it goes into the PDF header. Members of a company see the company logo there instead. Then turn on Moodboard and Client estimate. A row such as Estimate No. 13 shows which estimate goes into the PDF.
- Select Export. While Home Planner makes the realistic mood boards, you can select Skip AI moodboard to get the PDF at once with simple collages instead.
The PDF then gets a mood board page for each room and a page with your estimate at client prices; the shopping list hides your own prices.
If the AI mood boards cannot be made, for example without a connection, the PDF still comes out with simple collages of the room items instead, and Home Planner says so.
Trademark notice. Home Planner is not affiliated with, endorsed or sponsored by Apple Inc., Autodesk, Inc., Google LLC or Microsoft Corporation; their names and marks belong to their owners. iPhone, iPad and Mac are trademarks of Apple Inc., registered in the U.S. and other countries. Android is a trademark of Google LLC. Other trademarks are the property of their respective owners.
Try it on your own project
Free app for iPhone, iPad, Mac, Android and Windows.