How to Convert a PDF or Image Floor Plan to DWG

Upload a PDF or image floor plan to Home Planner, let it recognize the walls, and export a clean DWG or DXF drawing with layers, sizes and a sheet per floor.
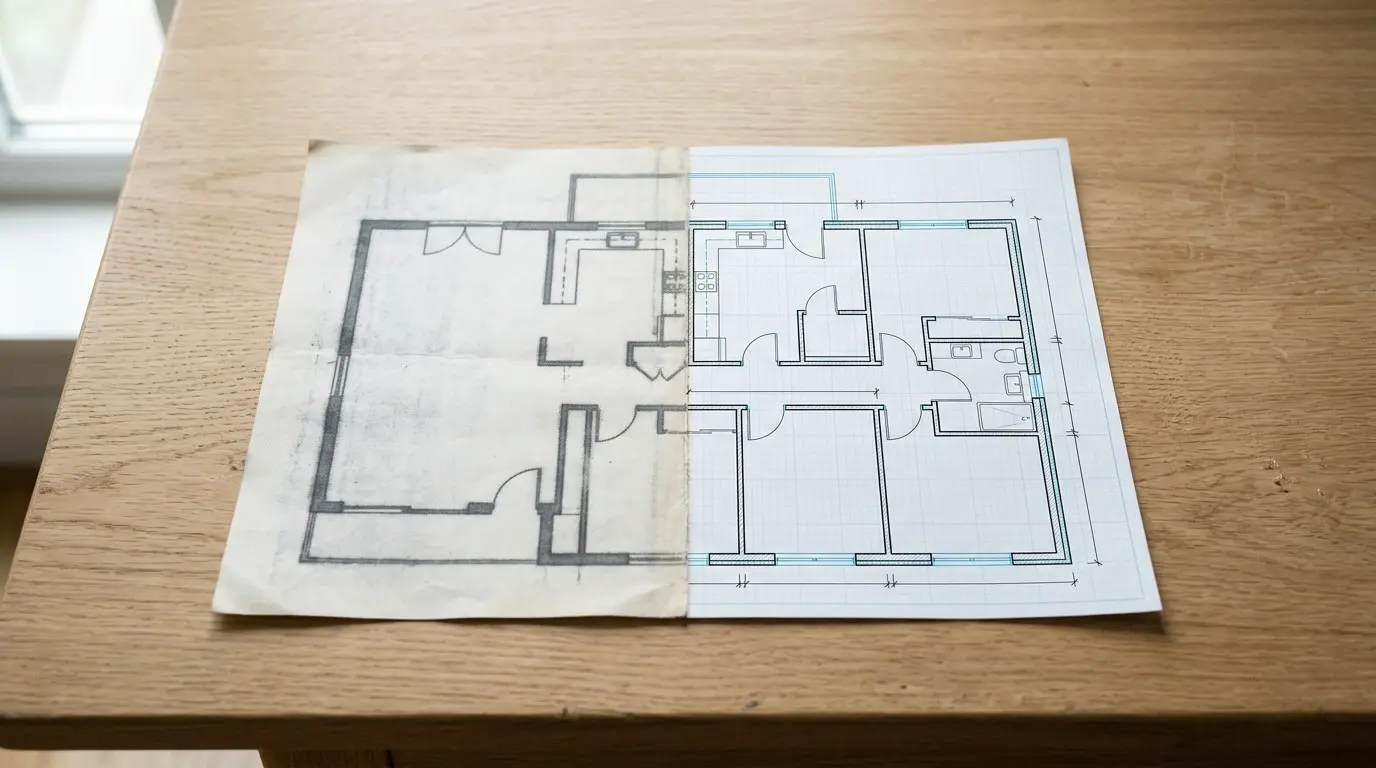
Home Planner converts a PDF or image floor plan to DWG in three steps: upload the plan, let Home Planner recognize the walls, doors and windows, and export the result as a DWG or DXF file. You get a clean vector drawing with real sizes, not a scanned picture inside a CAD file.
Home Planner is an app, not a web converter, and DWG/DXF export needs PRO+ or PRO++. It works on iPhone, iPad, Android, Mac and Windows; Automatic recognition on Mac needs macOS 14 or newer. The files open in AutoCAD and other CAD apps.
How it works
Home Planner turns the picture into a real plan first, and then writes that plan to a CAD file.
- Upload a PDF, JPG, PNG or another image of the floor plan, or a photo of a paper plan.
- Check the walls, doors, windows and the scale that Home Planner recognized.
- Export the plan to DWG or DXF and save or send the file.
Names in bold are labels from the app. If your app is not in English, it shows them in your language.
Before you start
You need Home Planner PRO+ or PRO++ and a clear image of one floor.
| You need | Why |
|---|---|
| A Home Planner subscription | Recognition: any Home Planner subscription. DWG/DXF export: PRO+ or PRO++. Without a subscription, the subscription screen opens when you select Automatic recognition. |
| Internet connection | Recognition runs on a server; wait until the plan appears. The DWG file is built on your device. |
| A PDF or an image of the plan | PDF, JPG, PNG, WEBP, TIFF, BMP, GIF and HEIC are supported. A PDF with several pages opens a page picker. One page holds one floor. |
| One floor per image, with sizes | Recognition works best on a sharp image with sizes, doors, windows and room names. If a page shows several floors, crop it to one floor in a photo or PDF app first. |
| Closed rooms | Room names and areas are written only for rooms with closed walls. If no room is closed, the export stops with a message. |
Step 1: Upload the PDF or image floor plan
To convert a PDF or image floor plan to DWG, upload it to Home Planner with Automatic recognition. Start a new project from the plan, or add the plan to the project you have open.
In a new project
- In Home Planner, open the Create screen and choose Plan from a Photo. Select Start.
- In Choose floor plans, pick the PDF or image file. For a building with several floors, you can pick one plan per floor. On a phone or tablet you can also take a photo of a paper plan. For a PDF with several pages, choose the pages with the plans. If the app says the file is too large, upload a screenshot of the plan instead.
- If a Floor order window opens, check the order of the floors. Select a plan to crop or adjust it, then select Continue.
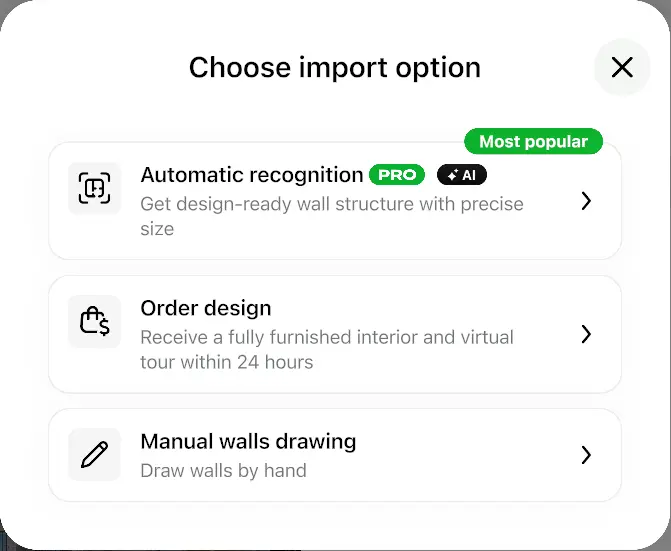
- In Choose import option, choose Automatic recognition. Ignore Order design if you see it. Home Planner finds the walls, doors and windows and builds the rooms.
Full guide to the upload and the recognition: How to convert a 2D floor plan to 3D.
In an open project
Here you add one plan at a time.
- Open the floor in the 2D plan.
- Select Upload Floor Plan in the toolbar. If the floor already has rooms, select Draw Wall first. A floor that already has a plan image does not show this button.
- For a PDF with several pages, choose the page with the plan. Then continue as in a new project, from Choose import option.
Prefer to draw the walls yourself? Select Manual walls drawing: the plan stays under the grid, and you trace the walls over it. The export works the same way.
Step 2: Check the recognized plan
Home Planner's recognition can make small mistakes, so check the plan before you export it. A DWG file is only as exact as the plan in Home Planner.
- Compare the length of one long wall with the size on the original plan. A Check the result message may ask you to do this.
- If the length is wrong, select Edit Walls, then Resize.
- If a window opens, select Change plan scale. With several floors, choose Change for current floor or Change for all floors.
- Select the length number on one wall and type its real size. Home Planner rescales the whole plan.
- Fix walls, doors and windows that are missing or in the wrong place. Select Edit Walls to move or add walls.
- Make sure every room is closed, so each room gets its name and area. The export stops if no room is closed.
- If the wall tools are open, select Done to leave wall editing. The share icon appears in the toolbar on the right.
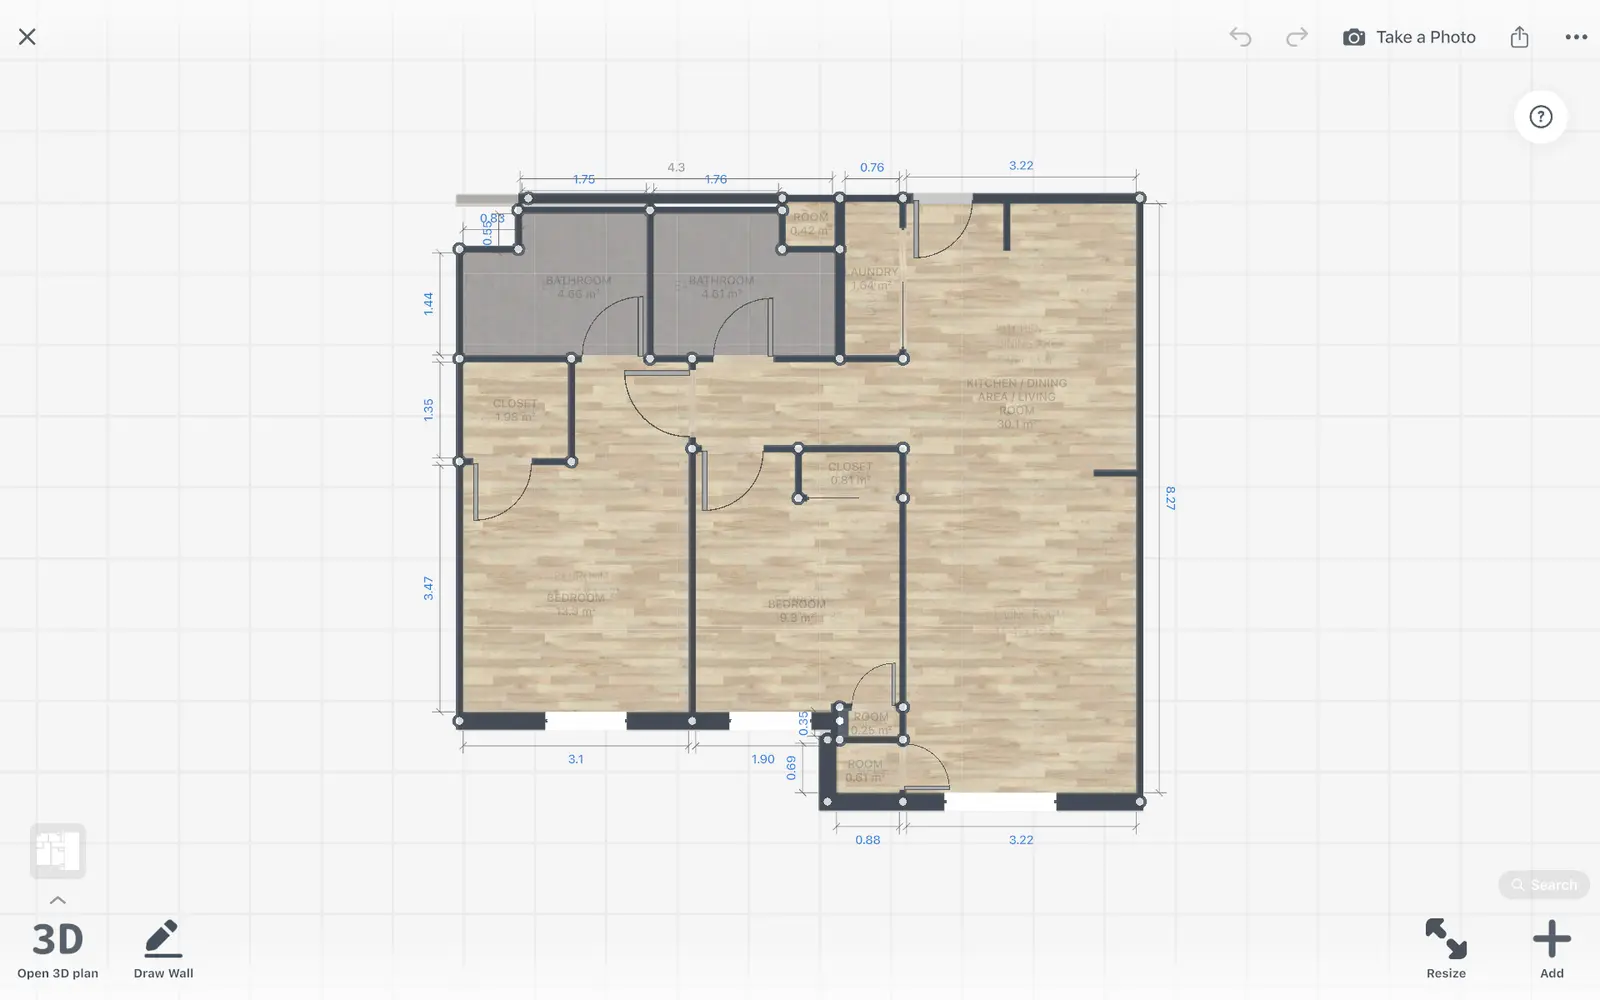
Step 3: Export the floor plan to DWG or DXF
Home Planner exports the plan to DWG or DXF from the share menu of the editor. Home Planner builds the file on your device in a few seconds; a large furnished project takes longer.
- Open the share menu: select the share icon in the toolbar on the right. If you do not see the share icon, select Done first.
- Select Export drawing.
- Choose DWG or DXF. The window shows what the file includes: walls, doors, windows and room sizes.
- Select Export. On a phone or tablet, the share sheet opens: save the file or send it. On a Mac or a Windows computer, choose a folder in the save window.
With PRO++, Furniture on plan is on by default and adds any furniture you placed. Switch it off for walls only. With PRO+, the row is shown, but selecting it opens the PRO++ offer.
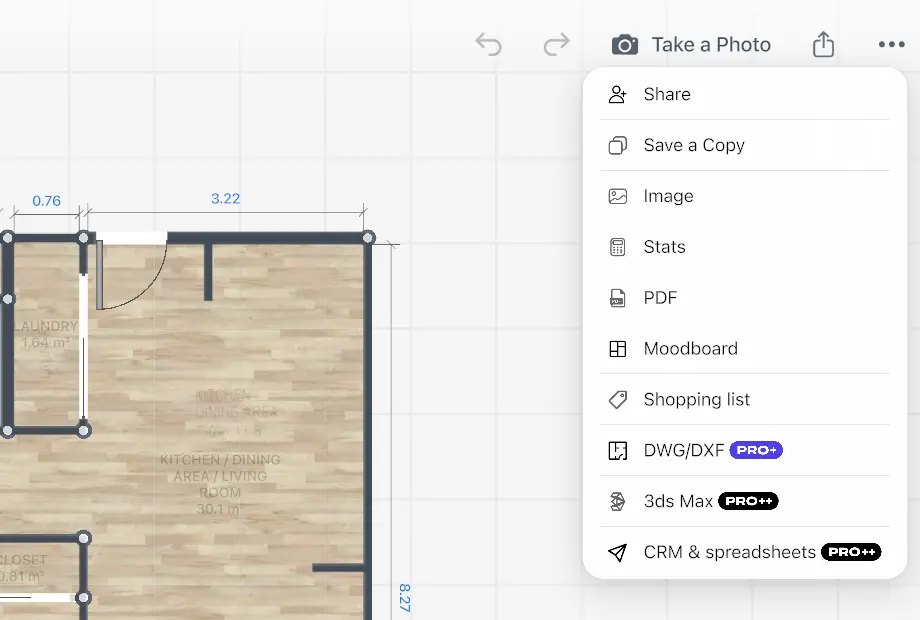
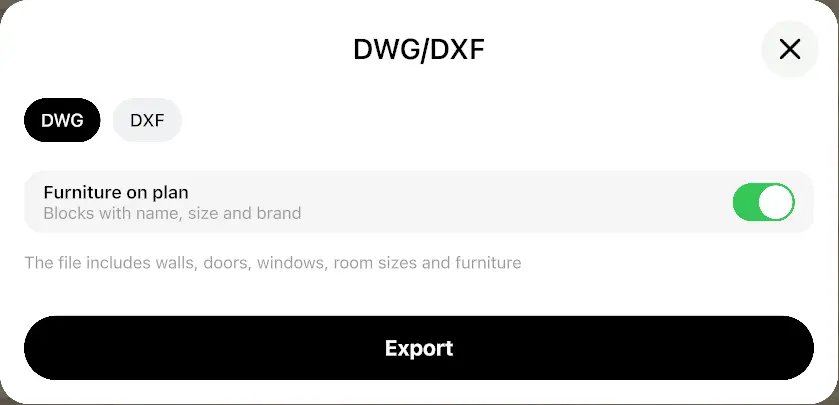
The same window also offers PDF and SVG with a Paper and scale setting. For a CAD file, choose DWG or DXF.
What the DWG file contains
The DWG or DXF file that Home Planner exports is a vector drawing of your plan in real units, with one layer set and one sheet for each floor.
| Part of the file | What you get |
|---|---|
| Layers | Five layers for each floor, named after the floor. Layer names end with the English words in the list below, in every app language. |
| Walls | One clean outline per floor, with openings cut out. Shared walls are not drawn twice. Each outline is a closed polyline. |
| Doors and windows | Door leaves with swing arcs, sliding and folding doors as panels, and window panes. |
| Sizes and rooms | Wall dimensions and room names with their areas. |
| Sheets | A layout tab for each floor. The Model tab shows all floors on top of each other. Switch floors on and off by layer. |
| Units | One drawing unit is one meter, centimeter, millimeter or inch, set by Units in Home Planner (feet are saved as inches). Set it before you export. |
| Title block with your logo | With PRO+ or PRO++ and Logo on photos and PDFs turned on in your profile, each floor sheet gets a frame and a title block in your app language: Project, Level, Scale, Date and "Print at 100% scale". The scale is fitted to the sheet (A4 landscape, Letter landscape for feet and inches), for example 1:87. |
| Furniture (PRO++) | Each item is a block with hidden attributes: name, size, brand and SKU. Each floor has its own Furniture layer. |
| File version | DWG in the AutoCAD 2013 format, which current CAD apps open. DXF as a text file. |
Layer names in the file, for each floor:
<floor name> Walls
<floor name> Doors
<floor name> Windows
<floor name> Dimensions
<floor name> Rooms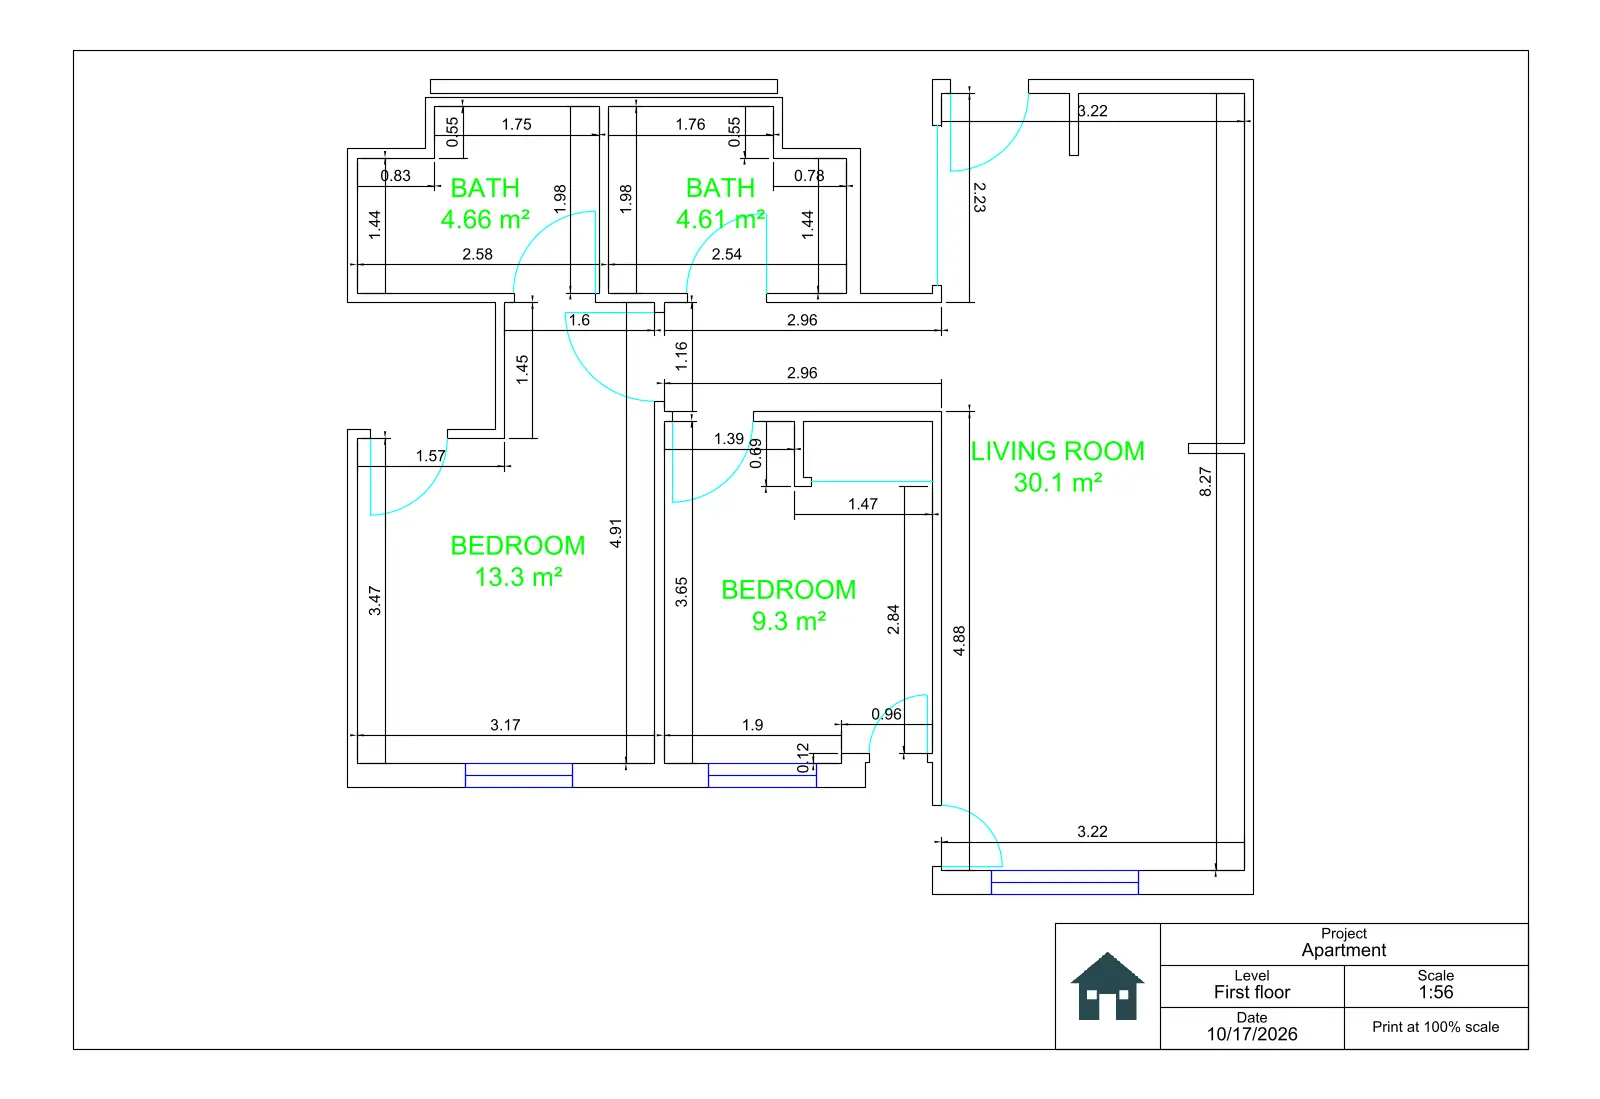
DWG or DXF: which one to choose
Choose DWG for AutoCAD and most CAD apps. Choose DXF when the receiving program cannot read DWG.
| Format | Choose it when | Notes |
|---|---|---|
| DWG | You or your contractor work in AutoCAD or a CAD app that reads DWG | The default choice. Opens on the plan view. |
| DXF | The program reads only DXF: free CAD and 3D apps, laser-cutting and CNC software | A text DXF in the 2013 version, with the same layers and sheets as the DWG. Very old DXF-only programs may not read this version. Dimensions and room names sit on their own layers: hide or delete them before you cut. |
Trademark notice. Home Planner is not affiliated with, endorsed or sponsored by Autodesk, Inc., Apple Inc., Google LLC or Microsoft Corporation; their names and marks belong to their owners. AutoCAD is a trademark of Autodesk, Inc. iPhone, iPad, Mac and macOS are trademarks of Apple Inc., registered in the U.S. and other countries. Android is a trademark of Google LLC. Other trademarks are the property of their respective owners.
Try it on your own project
Free app for iPhone, iPad, Mac, Android and Windows.